If you want to make your portrait photos look more realistic, you need to add skin texture.
Whether you’re a beginner or an experienced professional, you’ll find this technique simple and effective for applying realistic skin texture to a portrait.
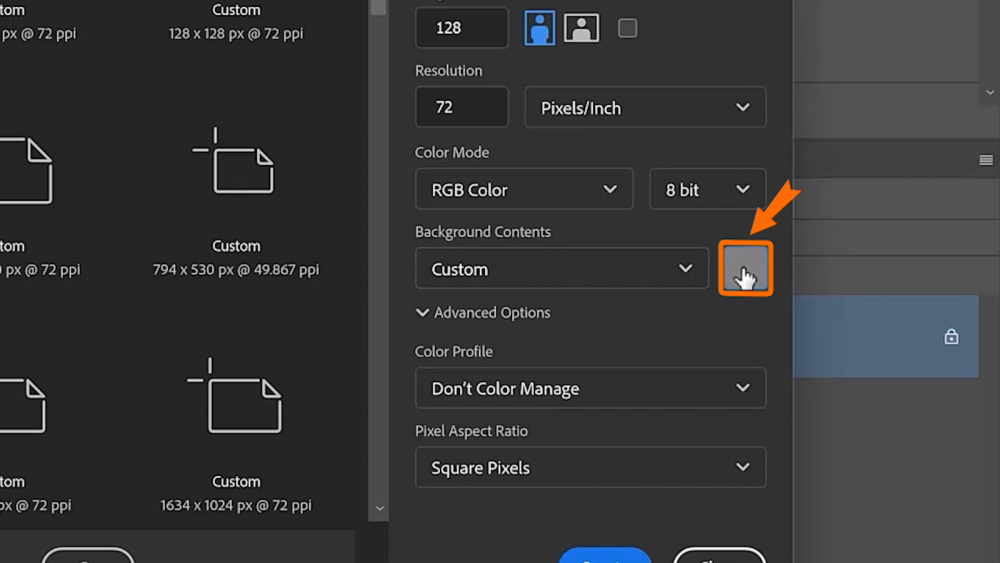
Step 1: Create The Document
Create a new document that is 128 by 128, RGB Color Mode with 8 bits.
Use a 50% gray background.
This creates a small gray square, which will become your skin texture.
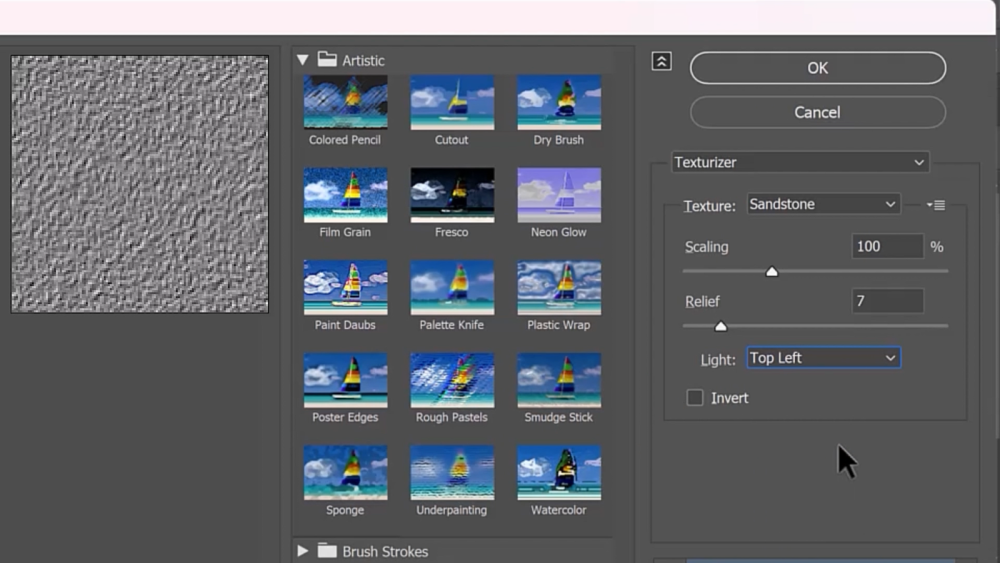
Step 2: Create The Skin Texture with the Texturizer Filter
Next, create the skin texture with the Texturizer Filter.
Go into Filter > Filter Gallery > Texture > Texturizer.
Select Sandstone under the Texture dropdown.
Set the scaling to 100 and the relief level to around 7.
Select the light source based on where the light is coming from in your image.
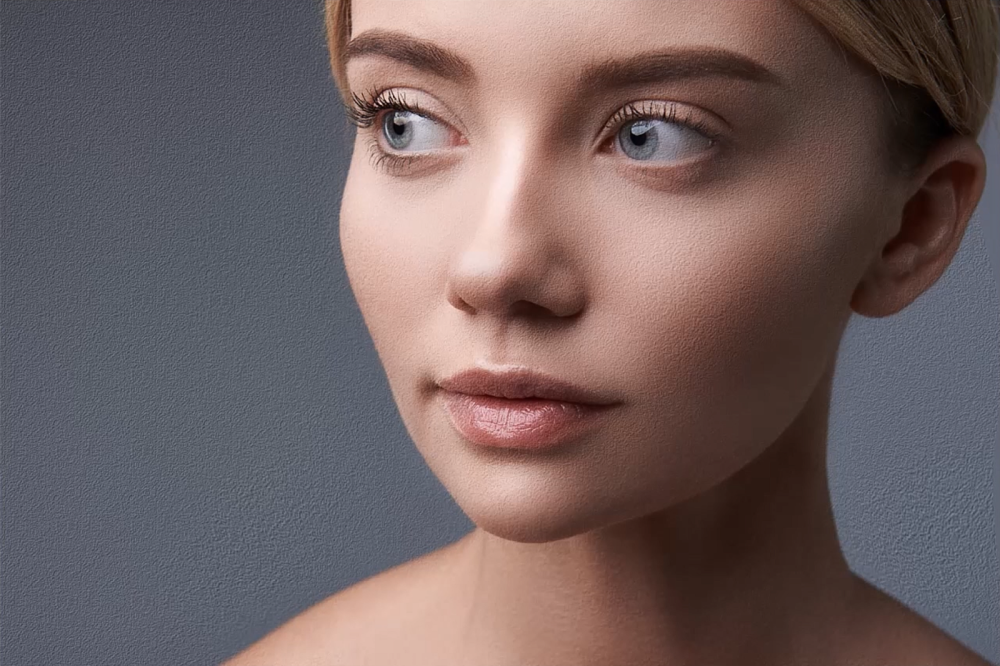
In the image we’re using in this tutorial, the light is coming from the top left.
Step 3: Create a Photoshop Pattern
Create a pattern based on your texture by going into Edit and selecting Define Pattern.
Name your pattern with a descriptive name, and press OK.
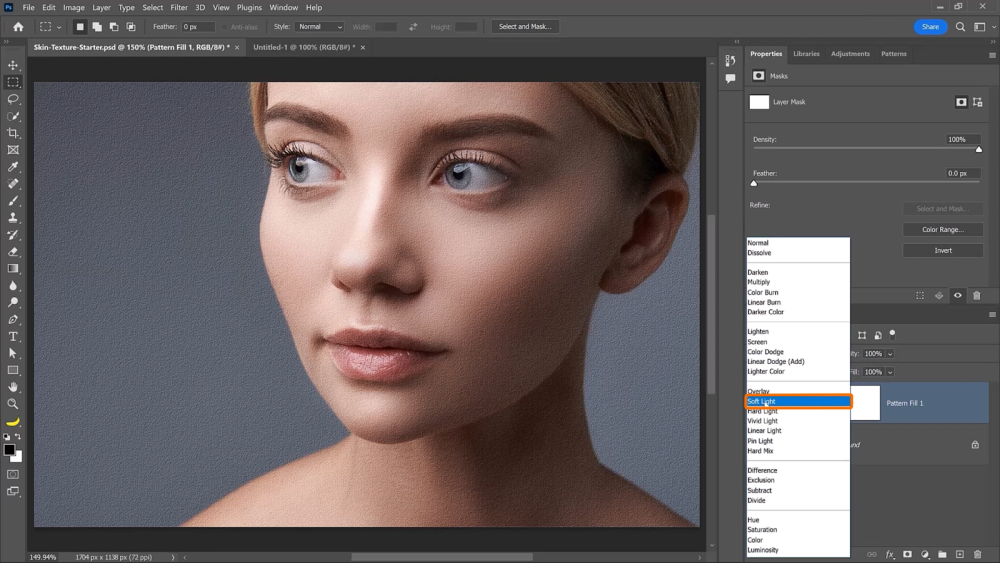
Select Pattern in the new Adjustment Layer icon, and choose the pattern you just created.

Next, blend the skin texture pattern with the layers below.
Click on the Blending Mode dropdown and select either Overlay or Soft Light.
In this case, we’ll use Soft Light, a more subtle effect.
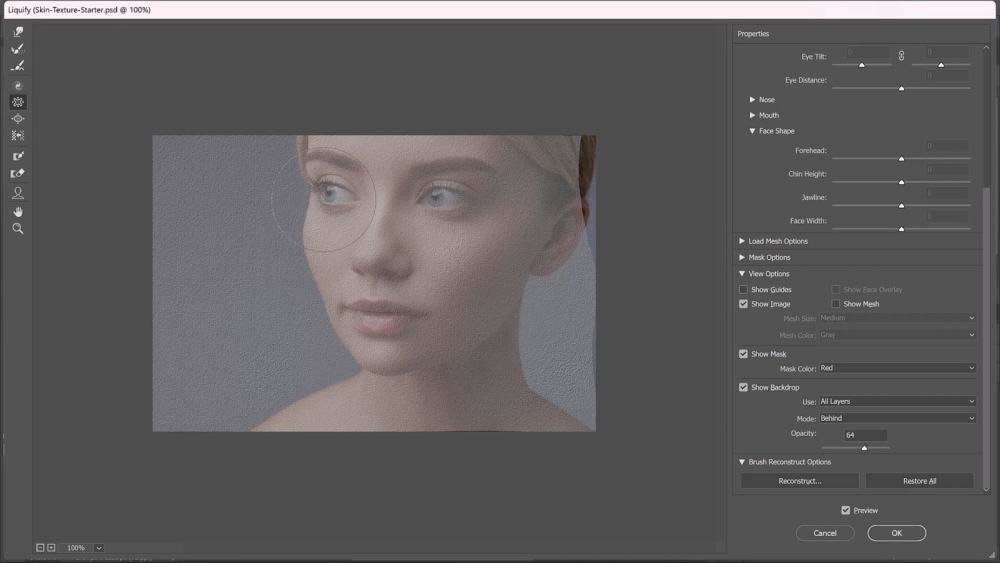
Step 4: Distort the Skin Texture with Liquify
To make the skin texture more realistic, go to Filter and choose Liquify.
Enable the backdrop and set it to All Layers with Mode: Behind.
Adjust the opacity to see both the pattern and the portrait you’re working with.
Use the Forward Warp Tool with a large brush tip to push and pull the pixels. Resize the brush with the left and right bracket keys as needed.
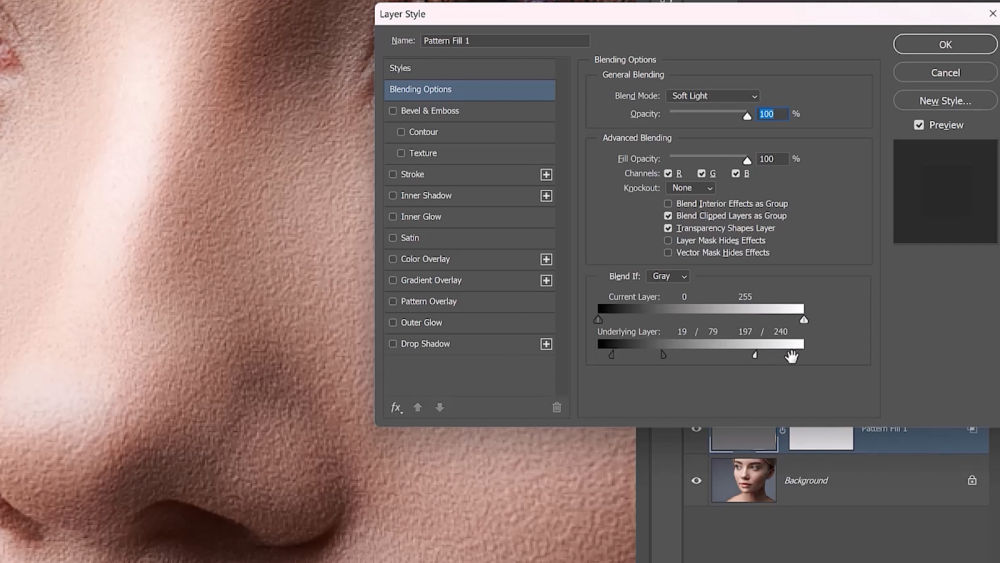
Step 5: Use Blend If To Hide from Shadows/Highlights
Sometimes the skin texture may look too harsh in certain areas, like in the highlights or shadows.
To fix this, go to the Layer Style dialog and select Blending Options.
From the Blend If section, under Underlying Layers, drag the black and white sliders to hide the texture in the appropriate areas or until the texture looks more natural.
Remember to hold Alt (Windows) or Option (macOS) and click on the sliders to split them in half and create smoother transitions between invisible and visible areas.
Step 6: Apply the Blur Tool to Match The Depth of Field
If your image has a shallow depth of field, you can use the Blur Tool to match the depth of field in the skin texture. This will make it more realistic.
Select the Blur Tool and choose a soft brush with a low opacity.
Use the tool to blur the areas of the texture that should be out of focus.
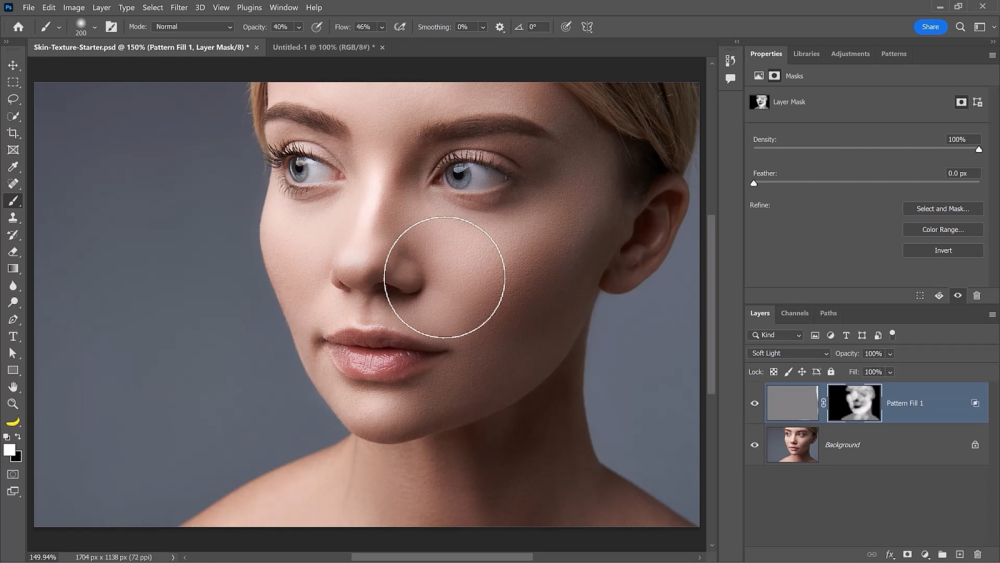
Step 7: Selectively Apply the Skin Texture
Finally, use a Layer Mask to selectively apply the skin texture.
Add a Layer Mask to the texture layer by going to the Layers Panel and clicking on the Layer Mask icon while holding Alt (Windows) Option (macOS).
This will create an inverted Layer Mask which will hide all the contents of the layer.
Then use the Brush Tool to paint with white over the areas where you want to apply the texture.
Remember: Black conceals, white reveals.
You can adjust the opacity of the brush to make it more or less transparent, depending on how much texture you want to apply.