As a creative professional with 18 years of experience, especially now with my work creating posters in the Hollywood industry, I’ve picked up a few pro-Photoshop masking tricks including advanced group masking techniques I’m sure you haven’t seen anywhere else!
Let’s jump right into it!
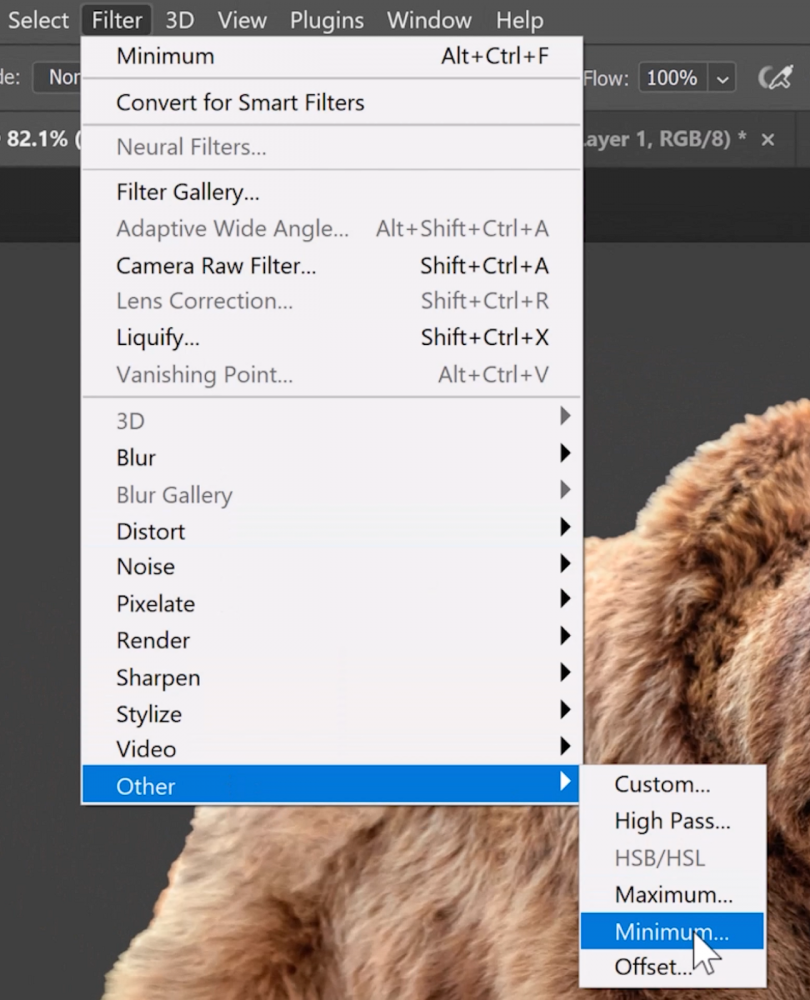
Trick 1: Minimum Filter
When you create a mask, you might see a white outline around the edges.

To remove this outline, go to Filter > Other > Minimum.

Select Roundness from the dropdown and drag the Radius slider to the right to remove the white outline.

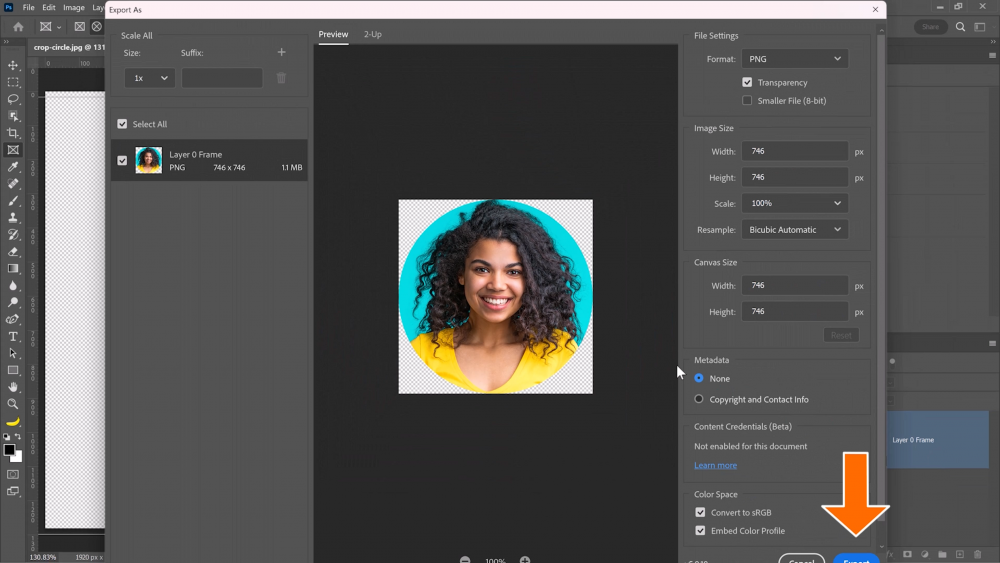
Trick 2: Vector Masks from Selection
Vector masks are perfect for objects with smooth edges, but they can be difficult and time-consuming to create. Here’s a trick to speed up the process.

Activate the Object Selection Tool. From the Options bar, enable the Object Finder.

The subjects in the image will now highlight as you hover over them.Click on one to make a selection.

Go into the Paths panel, hold Alt (Windows) or Option (macOS), and click this icon.


In the box that appears, input a number between 0.5 and 10.
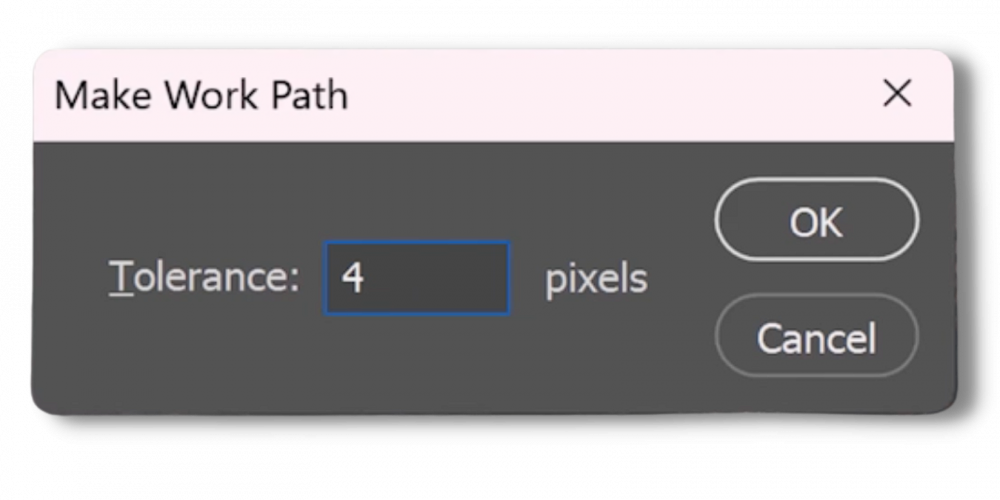
When you create a vector mask, use the fewest anchor points possible while maintaining the object’s shape.
Lower values give you more anchor points, while higher values give you fewer.
In this example, a value of 4 works great.
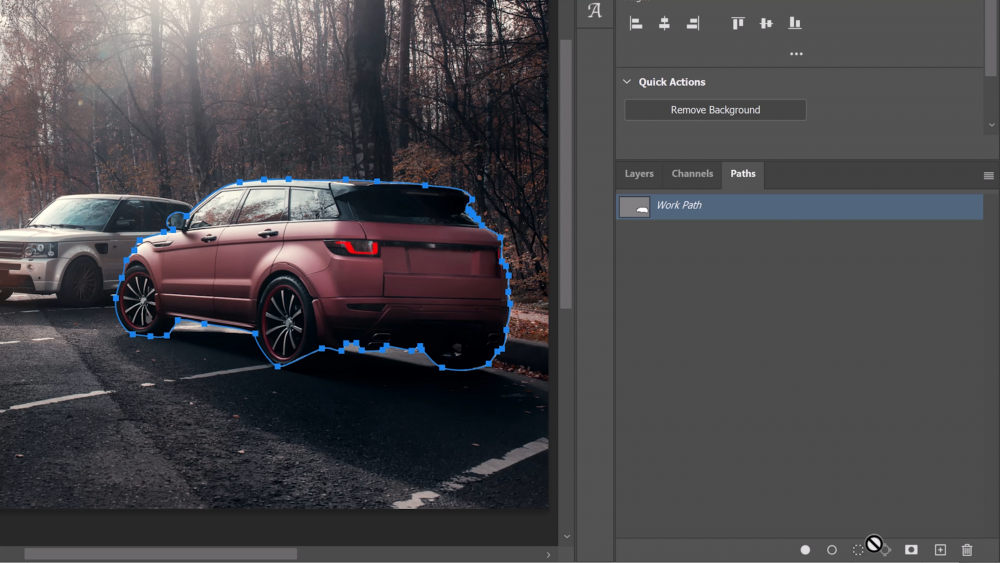
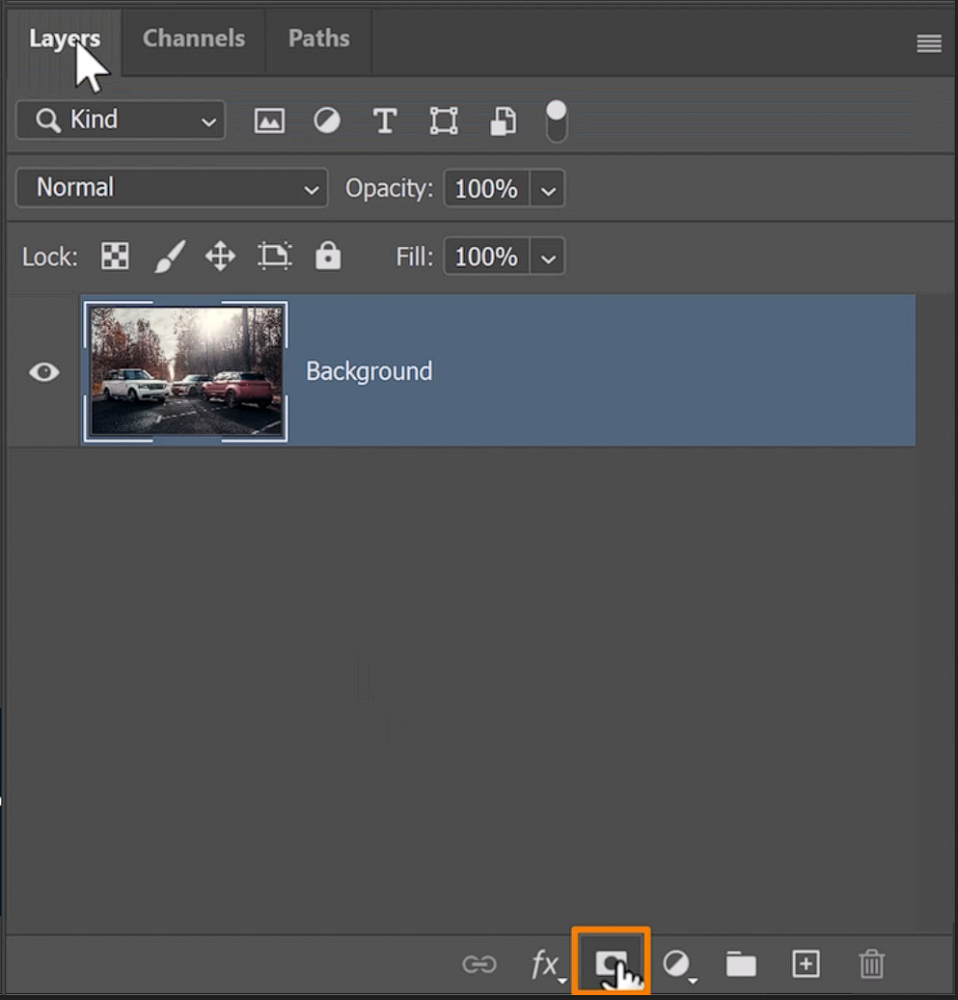
From the Layers panel, hold Ctrl (Windows) or Command (macOS) and click on the Layer Mask icon to create a Vector Mask.
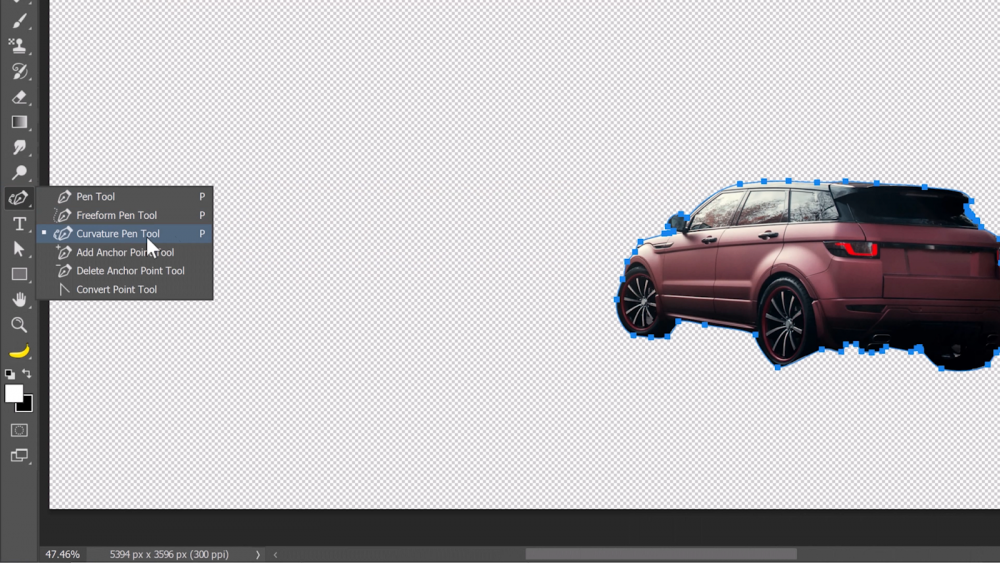
Now, you can use the Curvature Pen Tool and all other vector tools to edit the path.
When you’re done, you’ll have an object with smooth, razor-sharp edges.

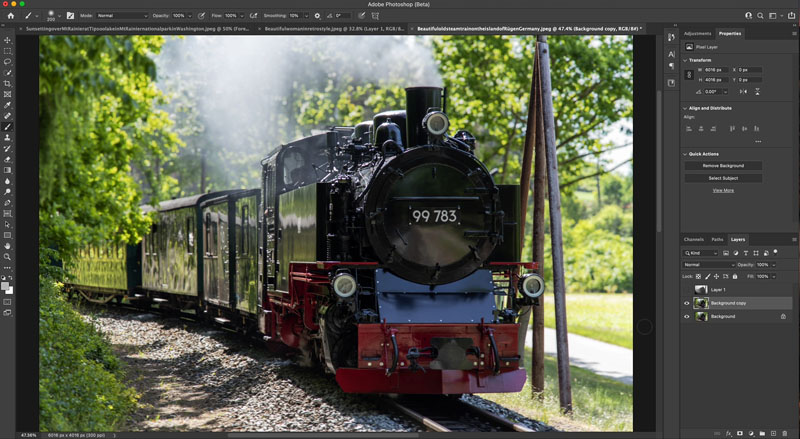
Trick 3: Custom Brushes for Masking
When you apply a mask to anything with hair or fur, the edges may not look great. Especially when it’s on a complex background.

One of the best-kept secrets in the Hollywood industry to masking hair or fur is instead of using traditional masking techniques, we DON’T MASK IT, PAINT IT!
One solution to this problem is to paint the mask instead of using traditional masking techniques. This is one of the best-kept secrets in the Hollywood industry.
To do this, you’ll need a custom fur brush. Let’s create one from scratch!
Use the Curvature Pen Tool on a white background with black as your foreground color.

From the Options bar, set the mode to Shape.

Then, click to add a vector point on top and bottom of the canvas, and then close the path by clicking on the first point.

Next, click on the center of the line to add an anchor point and drag out and
do the same on the other side.
When you have something that looks like a strand of hair, you can convert it into a Photoshop Brush.

Go to Edit and choose Define Brush Preset.
Give the brush a name and Press OK.

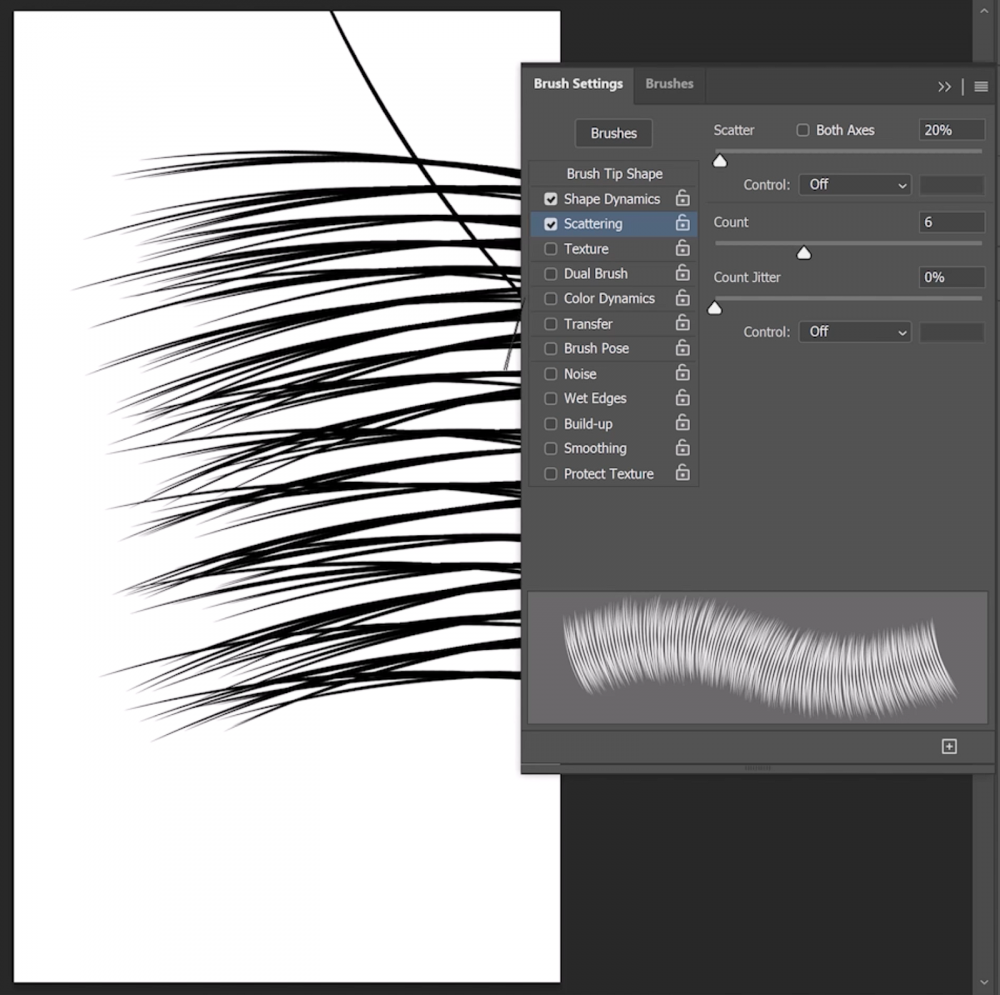
Then, go into the Brush Settings by clicking on the icon indicated in the image below.

You may use my settings as a starting point, but you can adjust the Spacing, Shape Dynamics, Scattering, and Count to fit your needs.
First, increase the Spacing. Notice the preview of the brush here.
Keep an eye on it as you change the brush settings.

Then, enable the Shape Dynamics.
Increase the Size Jitter to about 12% to make each strand slightly different lengths.
Add a tiny bit of Angle Jitter, and set it to 1% to slightly rotate each strand.
Set the Control to the Direction, so the fur follows the direction you paint along.

Next, enable the Scattering. Increase the Scatter to 20% and Count to 6 to add more strands.
When you’re happy with your brush, you can save it.
Click on the flyout menu and choose New Brush Preset and give it any name you want.

Now, go back into your working document, and let’s get the mask ready.
First, we need to contract the mask, so you have enough room to paint the fur back in.
Go into Filter > Other > Minimum.
Eight pixels work great in this case and Press OK.

Make sure that white is your foreground color. Zoom in to see the edge and paint.

Remember, you can use the left and right Brackets to adjust your brush size and use the left and right arrow keys to rotate the brush.
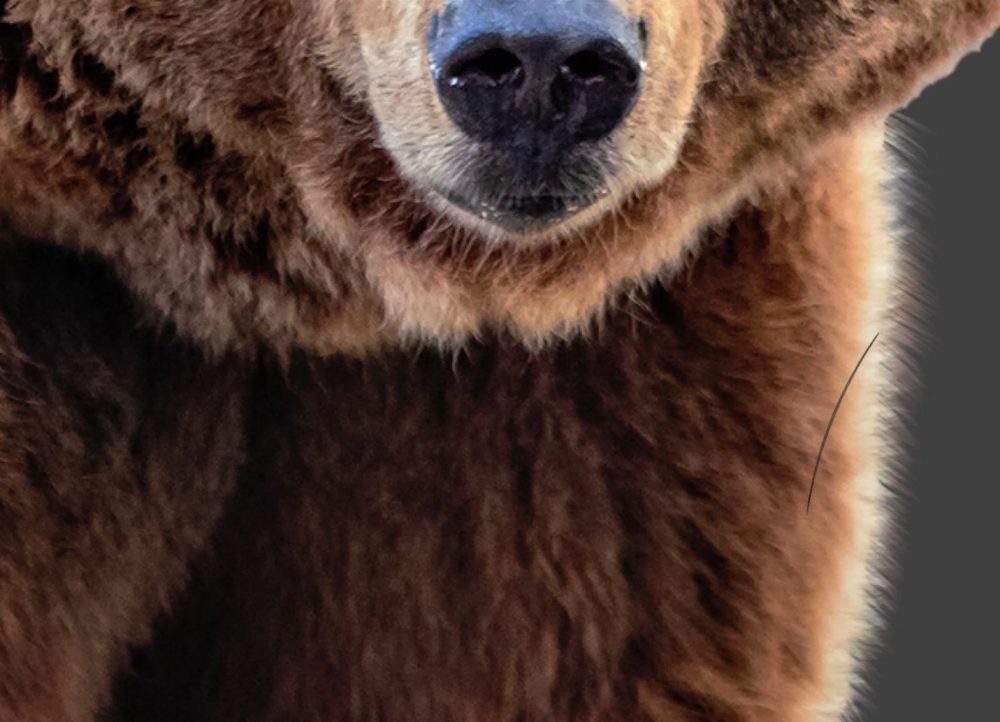
Keep painting along the edge until you’re happy with the results.
This looks much better than any selection you can make
However, you need to match the blur on your mask as well.
Go into Filter > Blur > Gaussian Blur.

Match the blur of the image as best as you can and press OK.
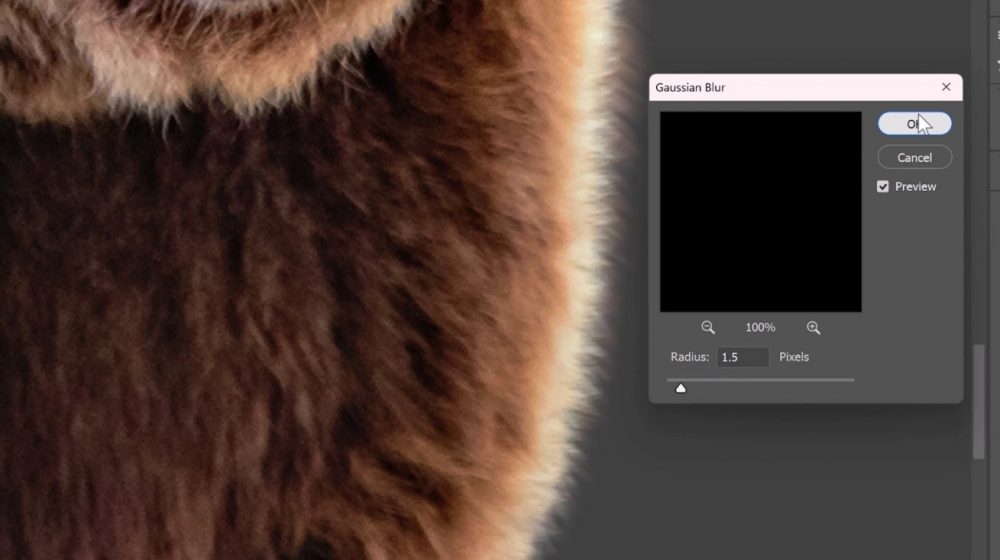
Now the edge of the mask looks fantastic.
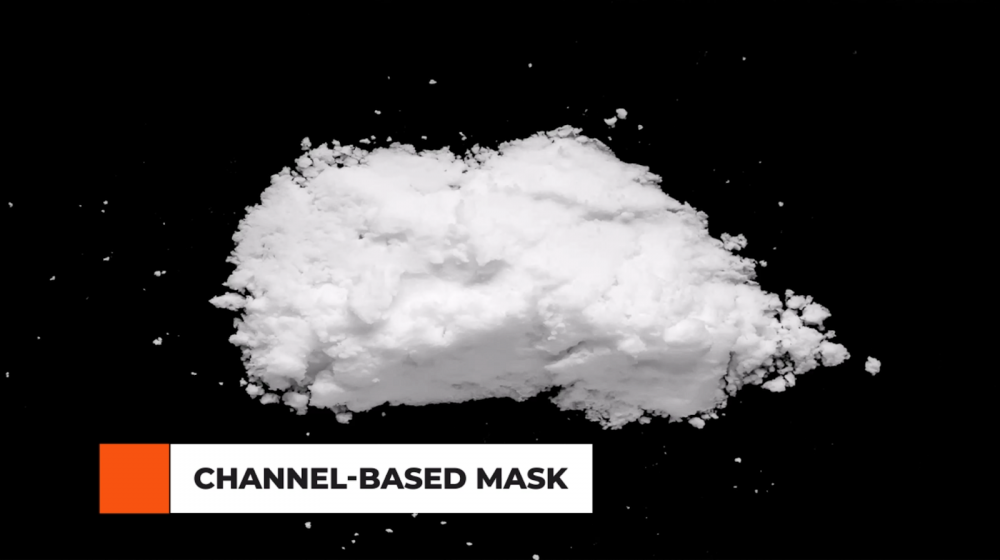
Trick 4: Channel-Based Masking
How do you mask this pile of snow to make it seem like it’s sitting on these wooden panels?
You might use a Blending Mode, such as Screen.
If you select Screen, black will disappear, and you’ll keep only the bright pixels.

But, we run into two problems.
One, the pile of snow becomes somewhat transparent, and we can see the background, which is not very good.
This is just the blend, which means we can’t apply a layer style to the edges of the snow, only to the edges of the layer.
But one trick that can come in handy, especially when dealing with complex images, is using a Channel-Based Mask.
A Channel-Based Mask allows you to take advantage of the unique color contrasts in different channels of your image, giving you more control over the masking process.
Here’s how to create one.
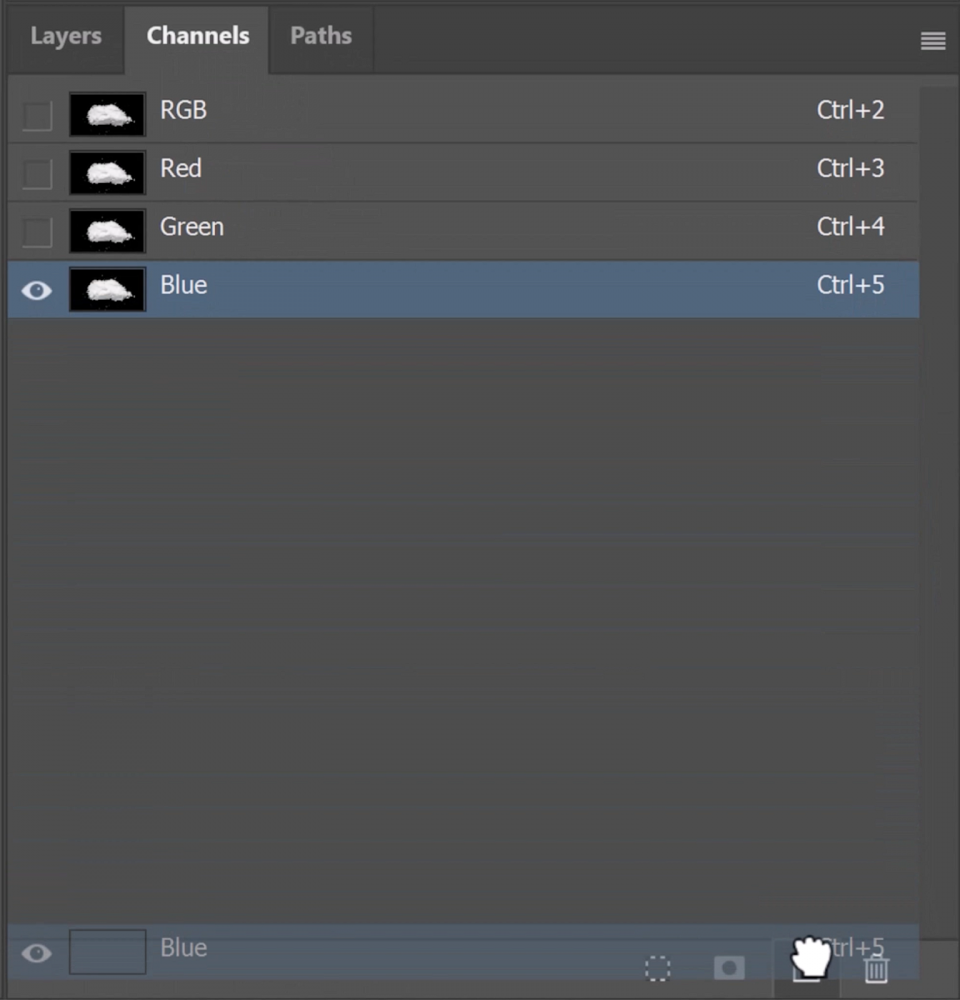
Go into the Channels panel and select the channel that has the most contrast between the foreground and background.
In this case, they’re all the same, so you can select any channel you want.
Duplicate the channel by dragging it into the New Channel icon.
Go into Image > Adjustment > Levels.

Adjust the levels by dragging to slider to make the background black and the foreground white.

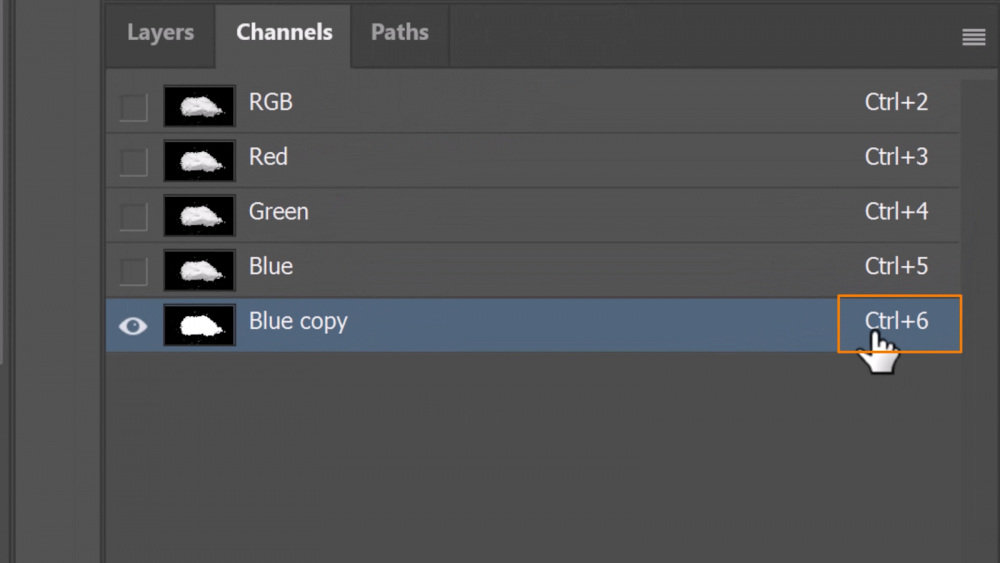
Create a selection out of the active pixels by holding Alt (Windows) or Option (macOS) and clicking on the right side of the channel you made.
In this case, it would be Alt Ctrl 6 (Windows) or Option Command 6 (macOS) you will create a selection out of the white pixels.

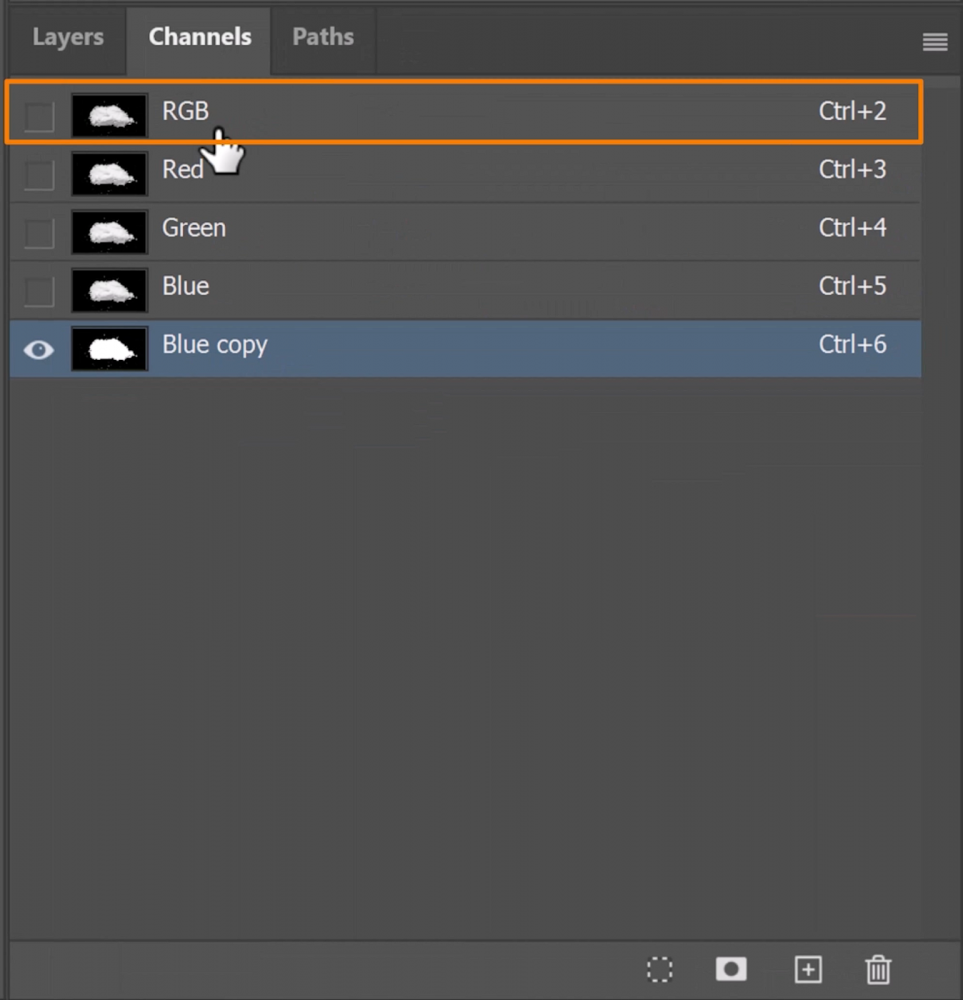
Go into the RGB channel and back into the Layers panel and click on the Layer Mask icon to create a mask.

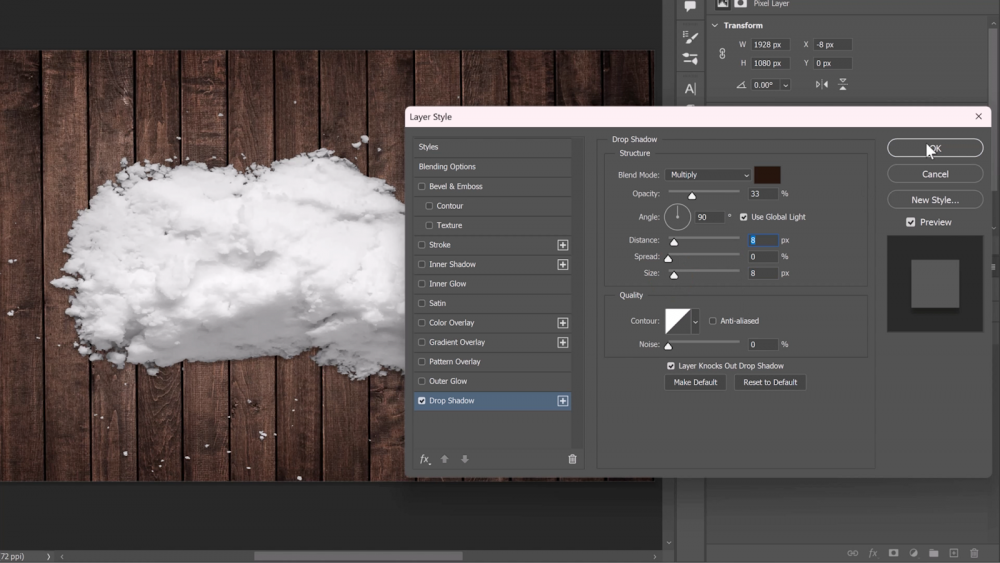
With this Channel-Based Mask, you can make your snow appear like it’s sitting on the wooden panels without any transparency or blend issues
You can even double-click on the side of the layer and add a Drop Shadow to create the illusion that the snow is actually sitting on the panels.
By using this technique, you can get more control over your masking process and achieve better results.

Trick 5: Knockout Group Masking
Knockout Group Masking is a powerful technique in Photoshop that allows you to create a mask based on a text layer while keeping the text editable.
This is done by using the Knockout feature in the Layer Style window.

First, take a look at the Layers panel. We have a background image of New York, a color lookup Adjustment Layer, and a group called Design.
Inside the Design group, we have a sticker that has been masked out already and has a layer style, creating an outer shadow.
We also have a text layer with the words “I love New York.”
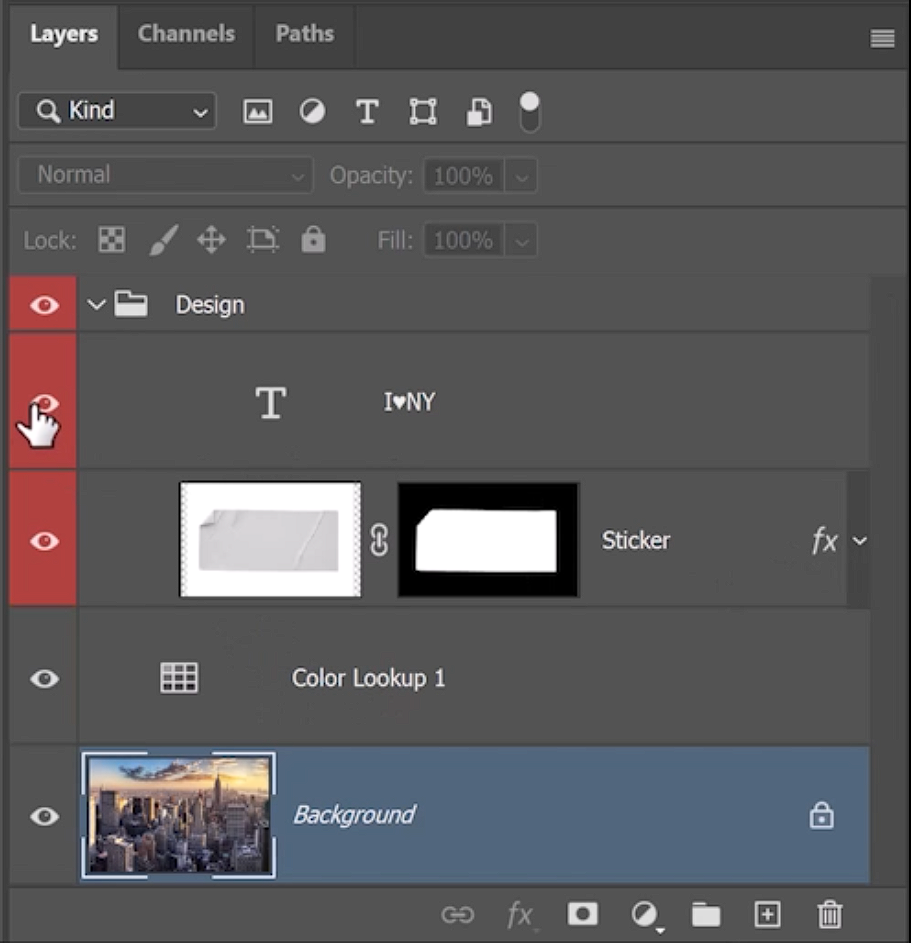
The goal is to create a mask based on the text layer to see the background
through the sticker layer.
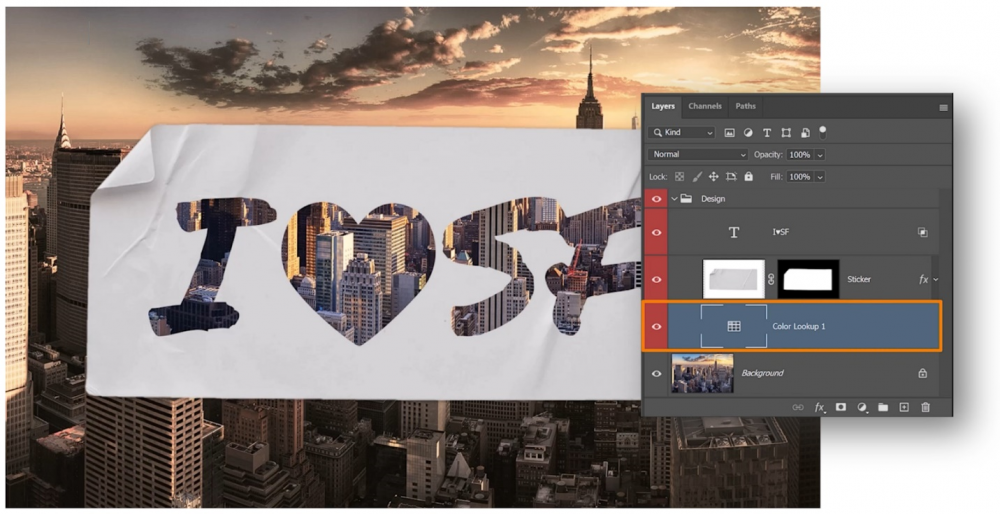
One way to do it is to create a mask with Black text. As seen in the screenshot below.
The downside is that this method does not give us an editable text.

For example, if you want to change the text to “I love San Francisco,” the mask must be recreated from scratch.
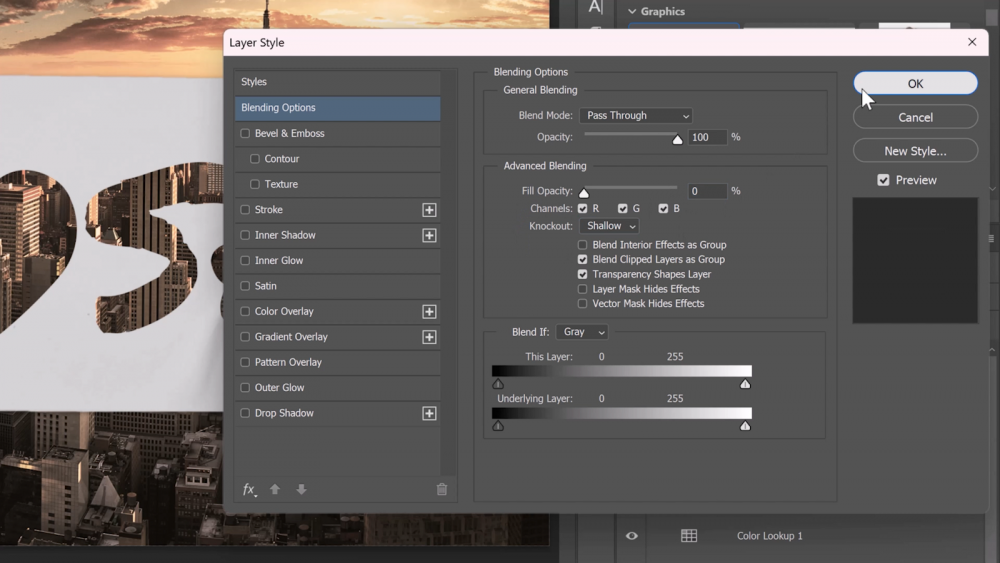
To keep the text editable and create a mask simultaneously, double-click on the side of the text layer to bring up the Layer Style window.

From the Knockout drop-down, select the Shallow option, then bring the Fill opacity to zero.

This will give you the same result as creating a layer mask on the sticker layer, but the text remains editable.

If you change the Knockout option from Shallow to Deep, the hole is punched all the way down to the background layer, even making a hole through the Color Look-up Adjustment Layer.

If you try this and see transparent pixels, then you don’t have a background layer.

To make sure the bottom-most layer is a Background layer,
go into Layer > New > Background from Layer.

Open the Layer Style window by double-clicking on the side of the text layer.
Change the option from Deep to Shallow.
This will create a hole that only affects the contents of the group.

To move layers up in the layer stack, you can use the keyboard shortcutCtrl ] (Windows) or Command ] (macOS).
This will cut a hole in the Color Lookup Adjustment Layer, revealing the original color.
To move the layer out of the group, press Ctrl [ (Windows) or Command [ (macOS)
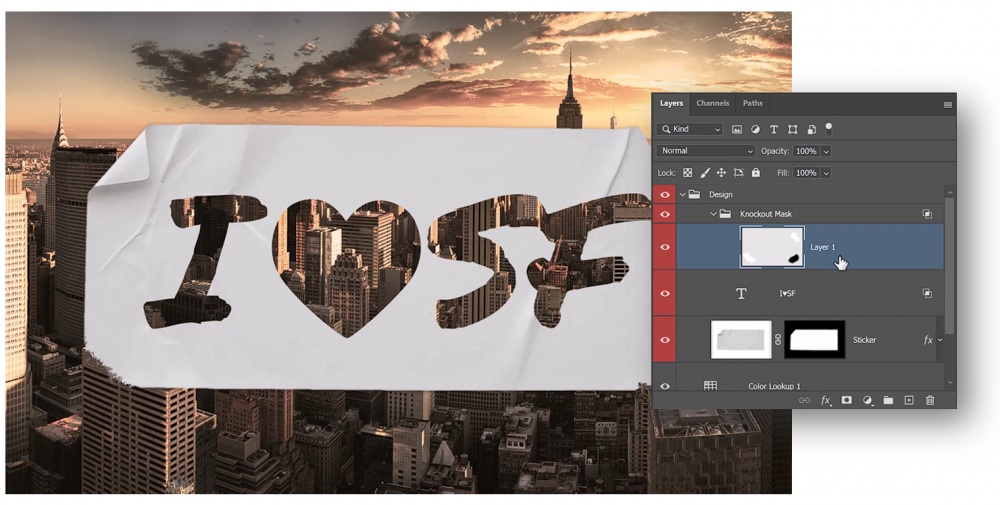
Another way to use the knockout method is to create a new group called “Knockout Mask” within the Design group. Double-click on the side of the group to bring up the Layer Style window.
Change the Knockout to Shallow, so this group only affects its parent group.
Change the fill Opacity to zero and press OK.
Anything placed inside this group will affect the text and the sticker layer.
Here’s how it’s beneficial.
Create a new layer and enable the brush tool by pressing the B key.

Select a brush to create a torn-edge effect.

Paint in black or white, as the color doesn’t matter.
This method is more beneficial as the pixels on this layer act as a mask, known as knockout pixels. This allows you to create the knockout effect using a brush.
To create even more interesting masks, bring in a layer and use Blend-If.
Drag an image with cracks into the design folder and make it larger to cover the entire sticker.

Then, drag it into the Knockout mask group. It will disappear because it is now covered by all of the pixels in this layer.

Double-click on the side of the layer to bring up the Blend-If options.
This allows you to hide and show pixels based on their brightness.
Hide the white wall by clicking and dragging the slider to the left.
Hold Alt (Windows) or Option (macOS) to split the points and create a smoother transition.

Now you have the cracks as part of your mask.
You can also use splatter brushes to create more holes by selecting them and creating a new layer.