Learn how to change the perspective of ANYTHING In Photoshop!
Perspective Warp in Photoshop Guide
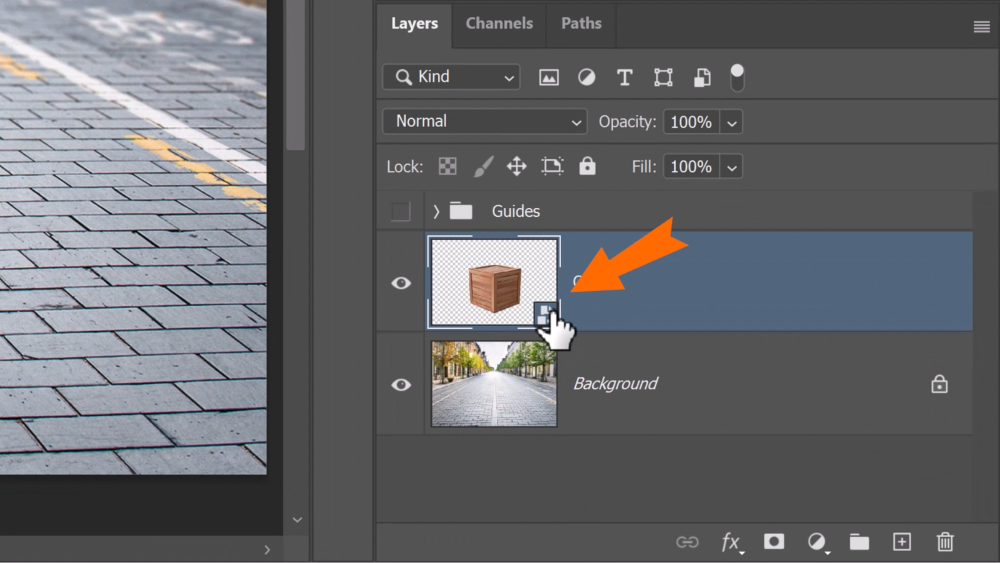
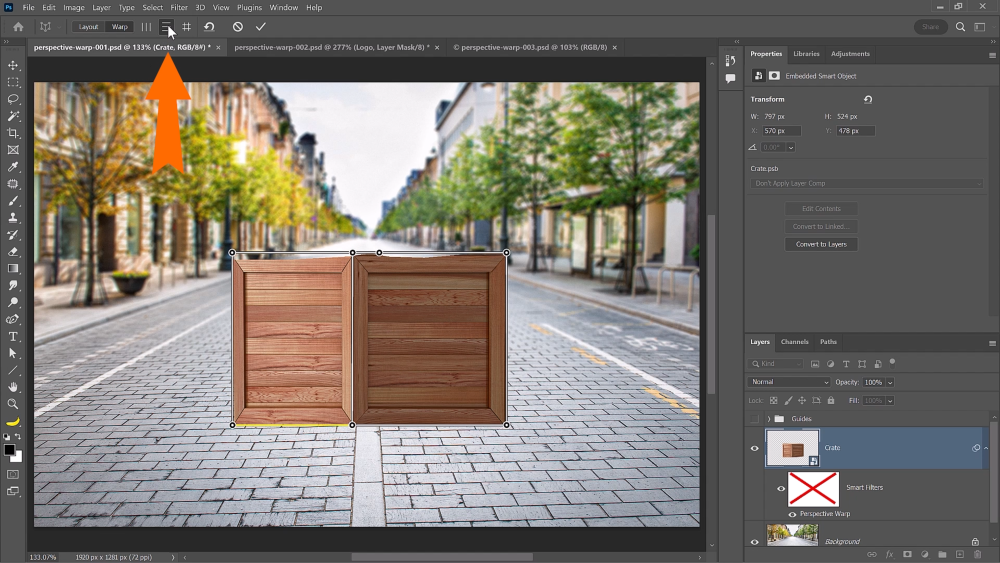
Start by opening up the document you want to work with.
In our example, we have a background layer and a crate that we want to adjust the perspective of.
I’ve already masked out the crate from its background.
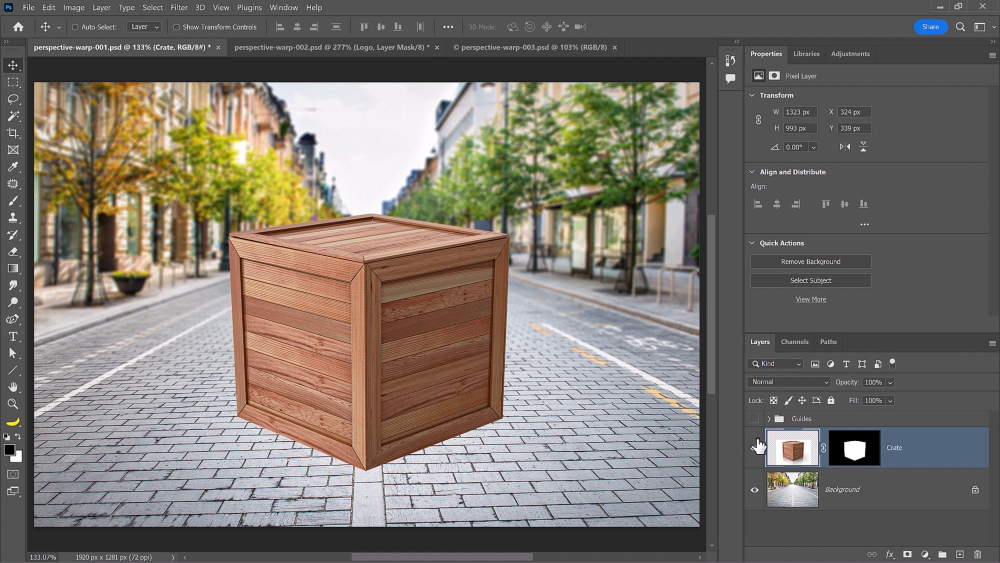
Convert it to a Smart Object, so we can make non-destructive changes to it later on.
Go to Edit menu > Perspective Warp.
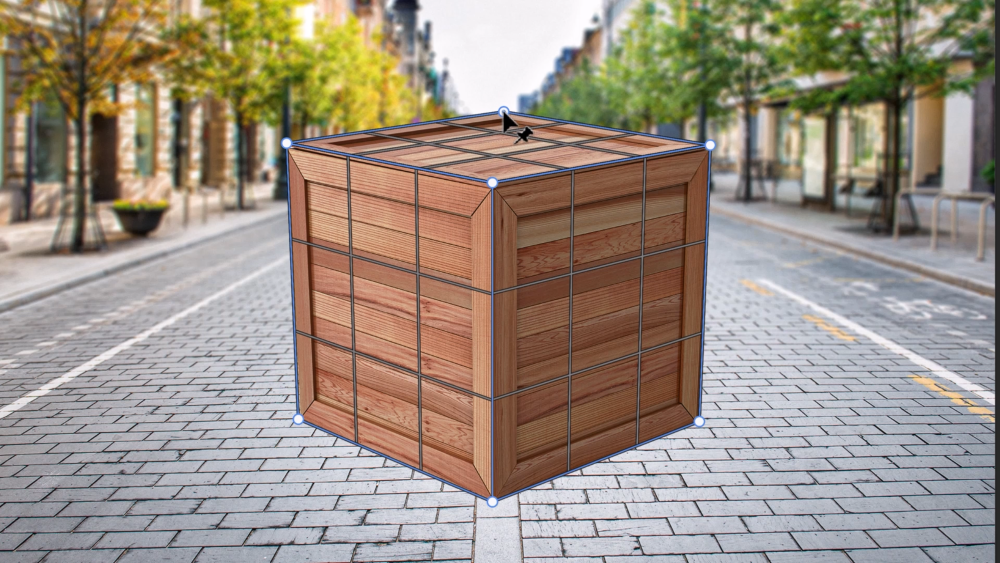
You’ll see a new workspace where you can create a grid to match the perspective of your object.
Step 1: Create The Layout
Click and drag over the crate to create a grid, and use the handles to match the perspective of the object.
Adjust the lines by clicking and dragging, and if you hold the Shift key, you can scale in perspective up and down.
Once you’ve created the first quadrant, you can move on to the second and third quadrants, using the same process to match the perspective of the crate.
When you’re finished, you’ll have a complete grid that matches the perspective of the object.
Step 2: Warp The Object
Click on the Warp icon, or use the W key to switch to the Warp view.
You can also tap the L key to switch back to the Layout view.
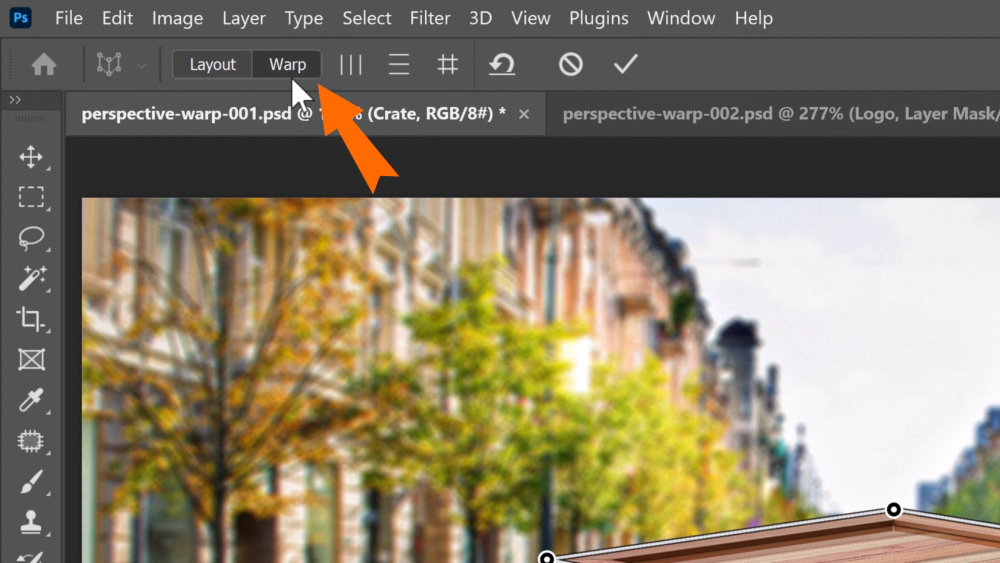
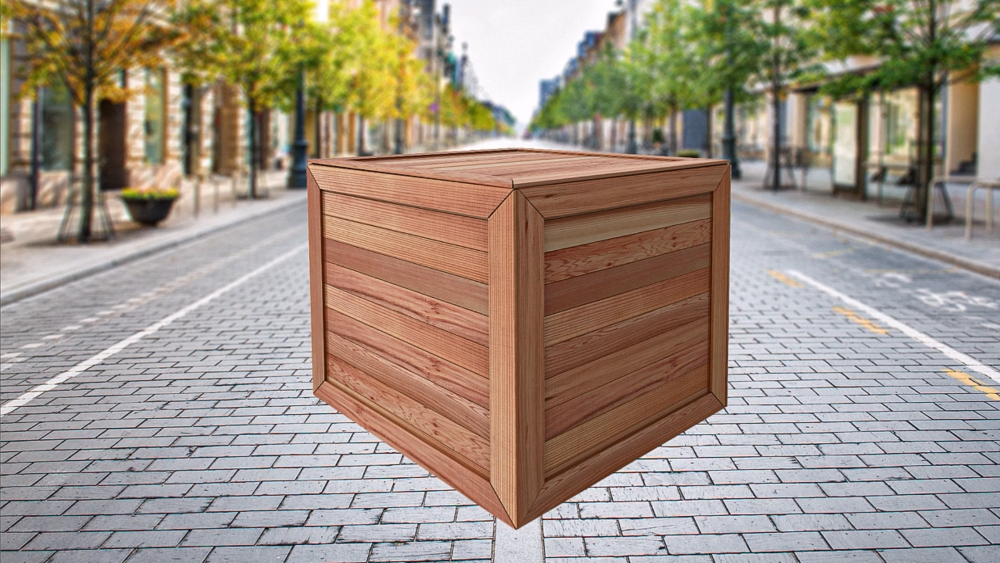
Drag on the points to completely change the perspective of the crate.
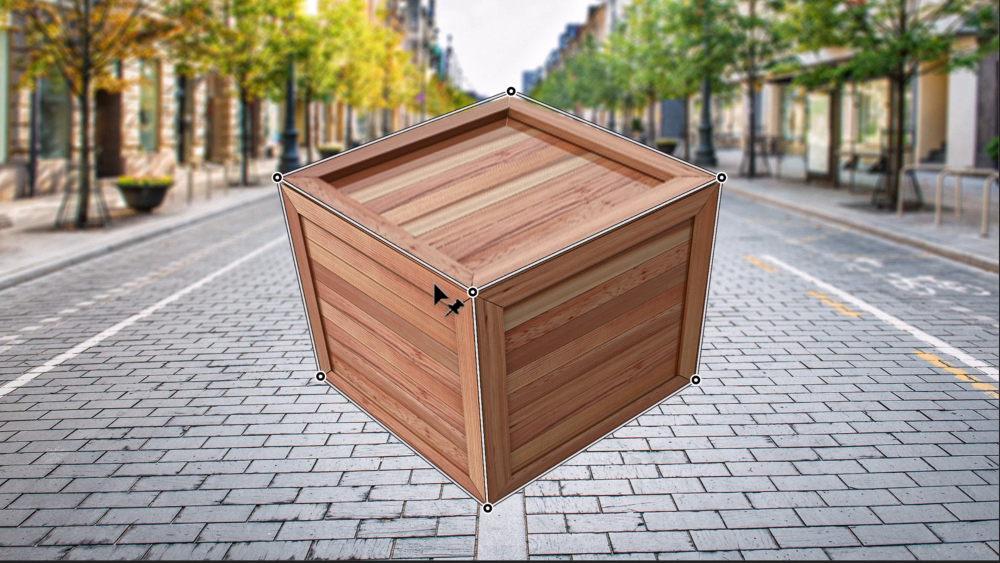
Straighten lines by holding the Shift key and clicking, and you can straighten all lines vertically or horizontally with the icons in the toolbar.
Once you’re happy with the changes, press Enter.
Perspective Warp and Compositing
In any scene, you have a ground plane and a sky, and the horizon line where they meet.
Anything above the horizon line, you’ll be able to see the bottom of it, and anything below the horizon line, you’ll be able to see the top.
Understanding this concept is crucial to making your composites look realistic.
Change The Perspective of a Room in Photoshop
First, let’s start with the room.
Always start by converting your layer into a Smart Object so that you can keep it editable.
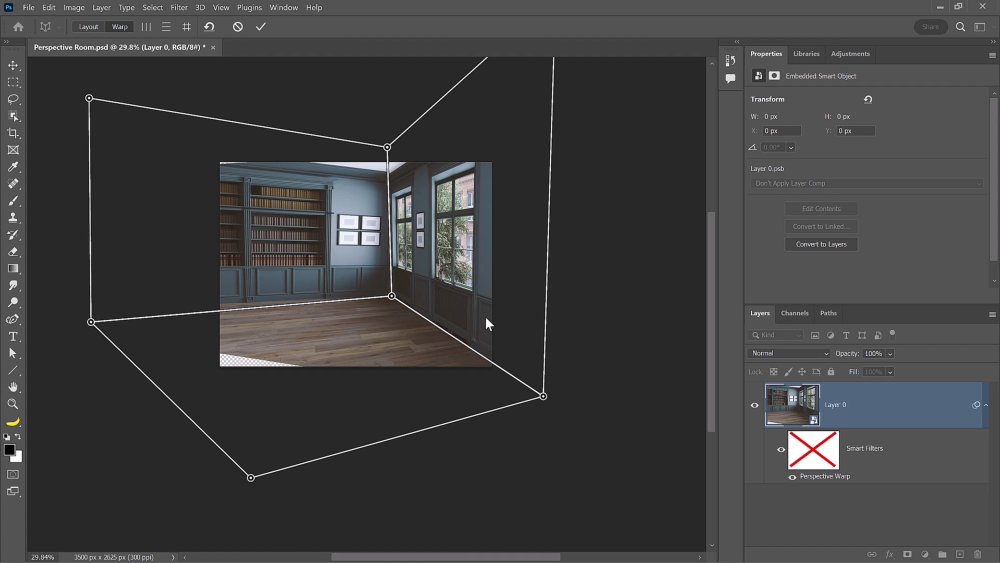
Go to Edit > Perspective Warp.
Zoom out to have more room to work with and hold the Space bar as you drag to pan.
Create a grid and use the lines already found in the image to align the quadrant to it.
When it highlights in blue, release and Photoshop will snap it into place.
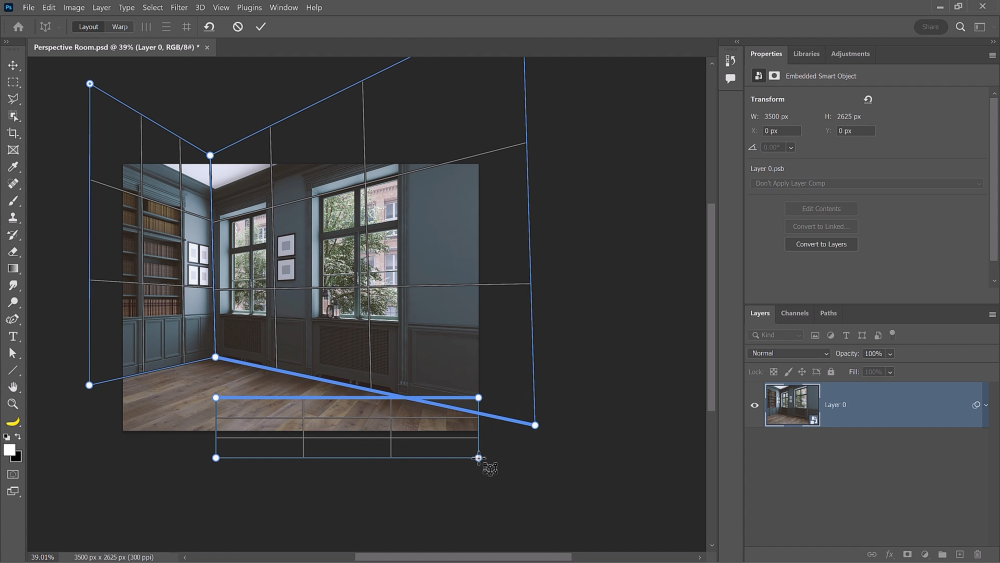
You can adjust it accordingly to match the perspective.
Important Reminder:
The quadrants need to cover the entire photo to avoid weird distortions.
If you have something that looks like this, tap on the W key to switch over into Warp mode and click on this corner handle to rotate the room in perspective.
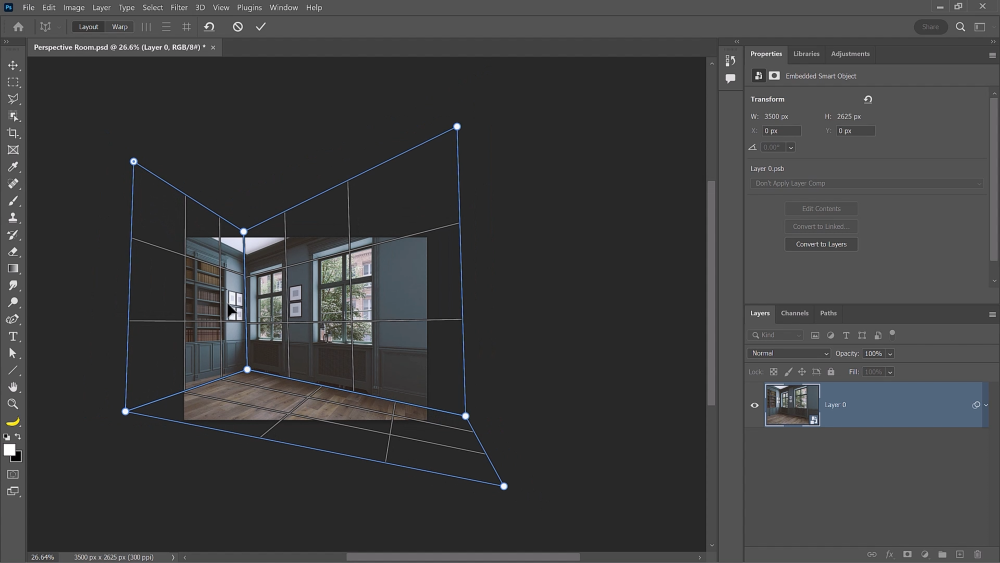
Click and drag on the other points to better adjust your image.
Keep adjusting the Perspective Warp until you have something that looks like this.
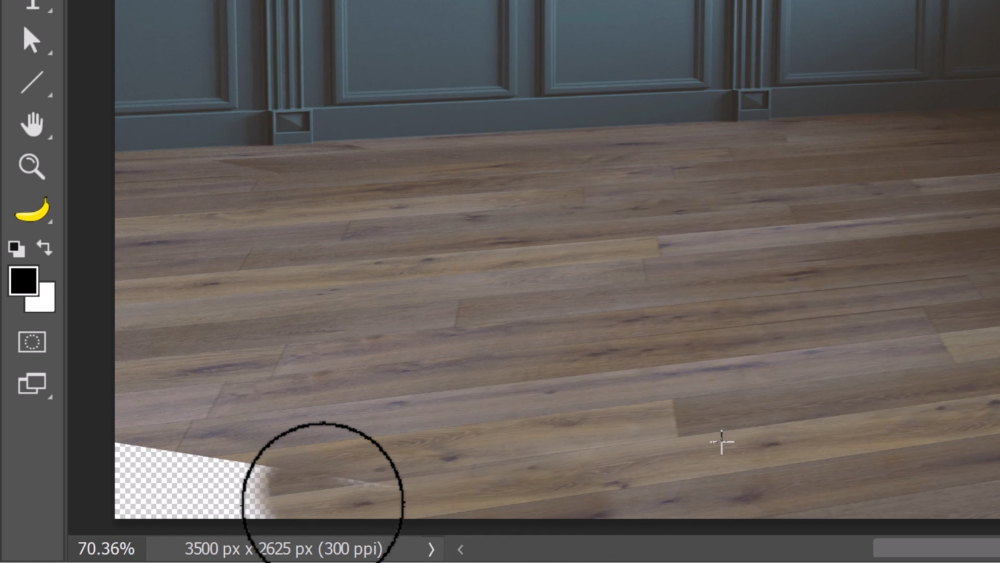
To fix the transparent areas, use a new Layer and enable the Clone Stamp Tool.
Hold Alt (Windows) or Option (macOS) and click to sample. Then align and paint.
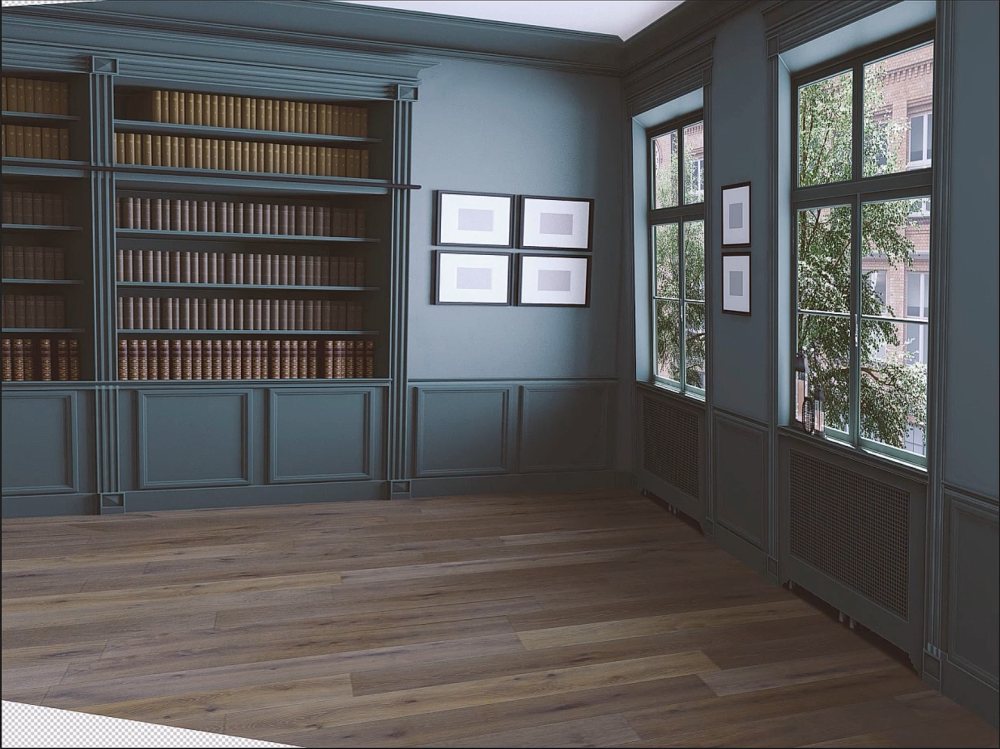
Commit the changes and click on the Eye icon to see the before and the after.
Before:
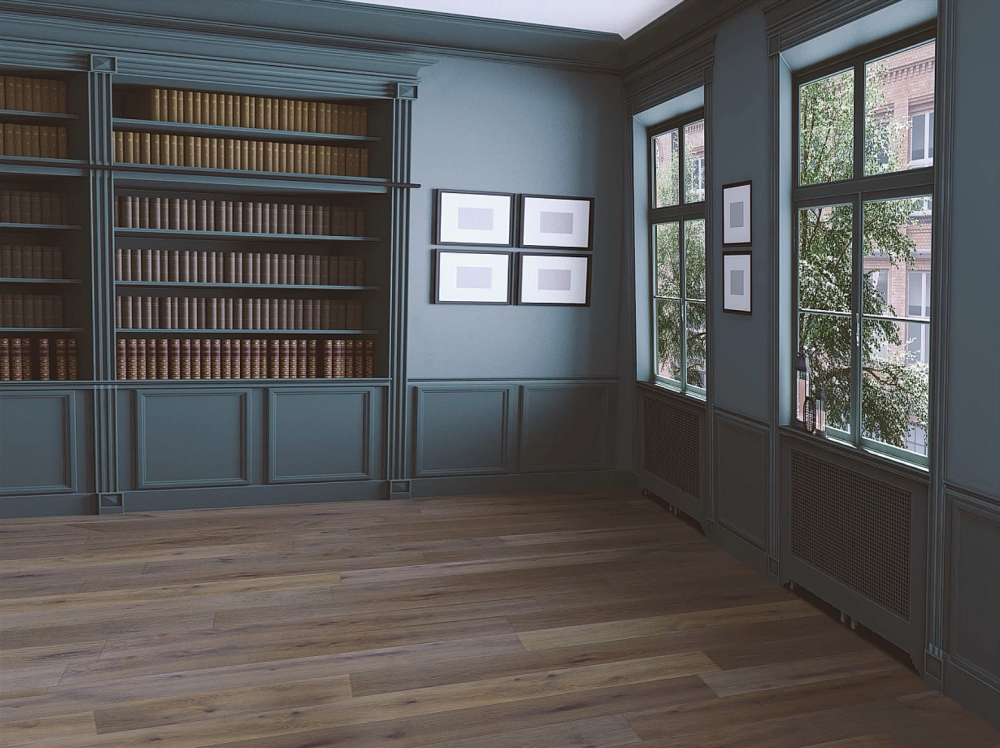
After:
Change The Perspective of a Building in Photoshop
Now, let’s move on to the building.
Right-click on the layer and choose Convert to Smart Object.
Go to Edit > Perspective Warp.
Select a smaller portion of the building.
Hold Shift and drag out to extend the grid.
Adjust the grid to make sure that it covers all the buildings.
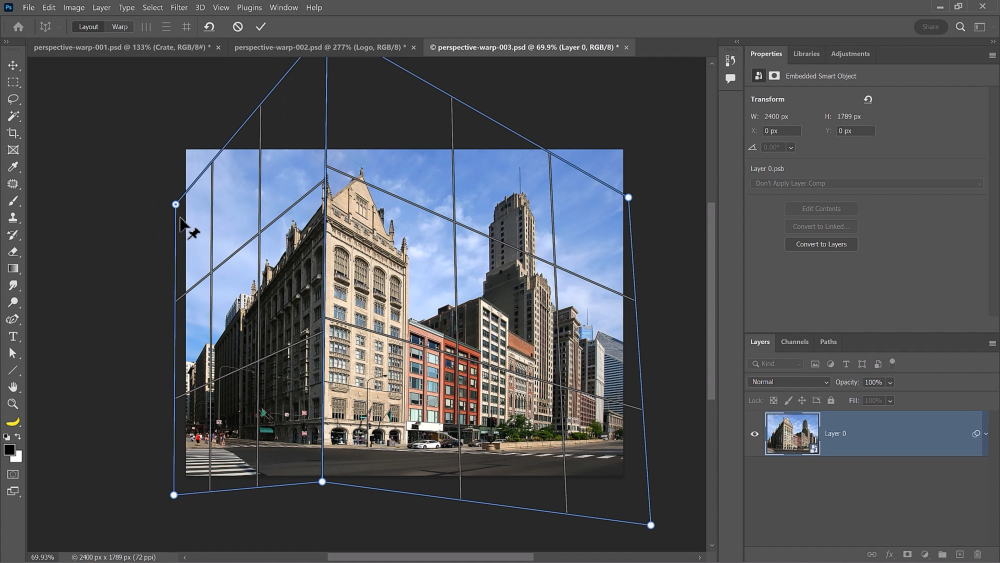
Create a grid on the opposite side, make sure that it snaps into place, and adjust the grid to match the perspective.

Tap on the W key and from here hold Shift, click on the center line, and drag to change the perspective of that street.
Apply a Logo in Perspective in Photoshop
We’ll use Perspective Warp to make it seem like the logo is on the floor.
Using the same steps, Convert it into a Smart Object.
Then, Edit > Perspective Warp.
Create just one grid.
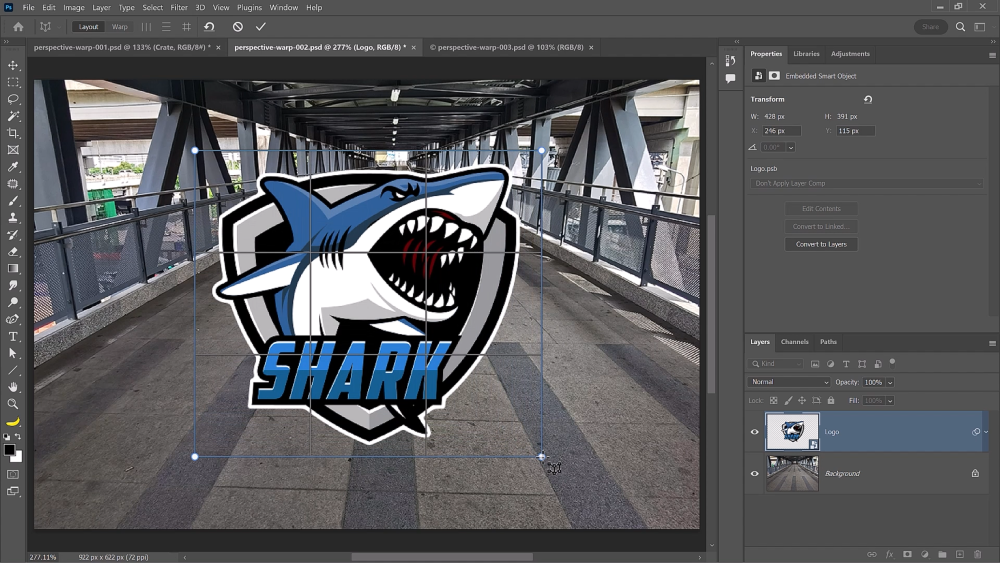
Tap on the W key to enter the Warp mode.
Use the corner handles to match the perspective in the scene.
Match the lines of the grid to the lines found in the photo.
To unlink the lines, hold Shift and click on them again.
Press Enter (Windows) or Return key (macOS) to commit the changes.
Hold Shift and click on the line to join two points together.
It will turn yellow and you can drag it accordingly.
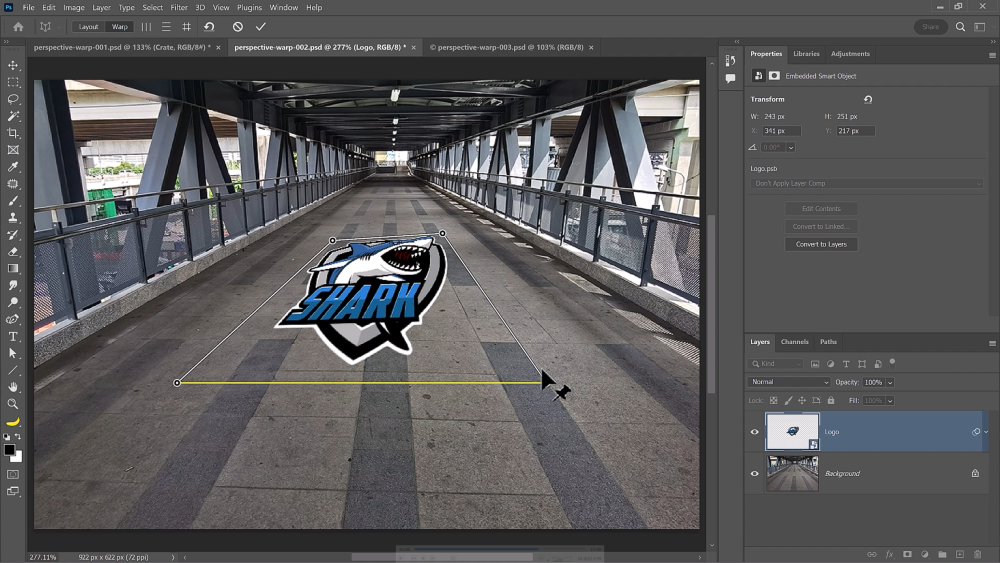
Now the logo is on the ground in perspective.
For a more realistic effect, change the Blending Mode to Soft Light and you can use any other blending technique to blend the logo better with the background.

Apply a Graphic in Perspective to Multiple Planes
We’ll take a look at how to create a perspective template that can be used to apply any graphic with ease.
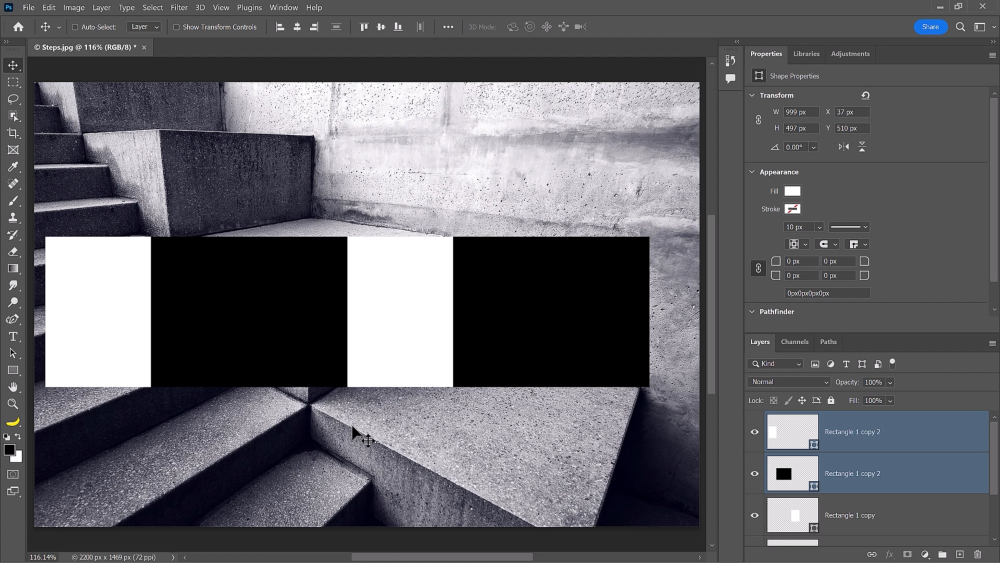
Step 1: Create Rectangles
Enable the Rectangle tool from the Options Bar, with Shape enabled and Fill set to black.
Create a rectangle by drawing it on your canvas.
Press V to enable the Move tool and hold Alt (Windows) or Option (macOS) while dragging to the side to duplicate the rectangle
Make the second rectangle white to see the difference.
Press Ctrl T to transform and scale it down.
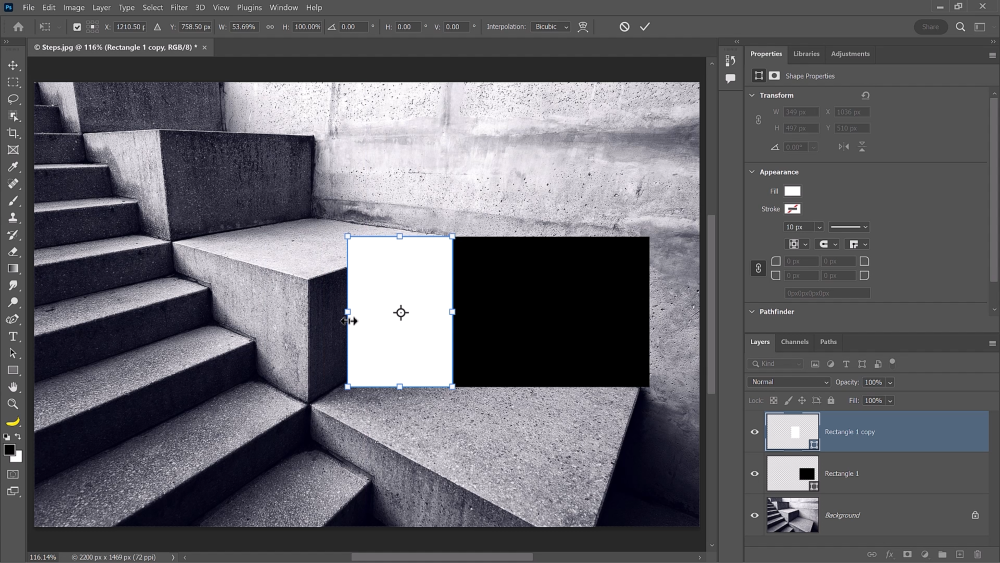
Then select both rectangles by holding Shift and clicking on them from the Layers panel.
Duplicate them by pressing Ctrl J and move the duplicates to the left side.
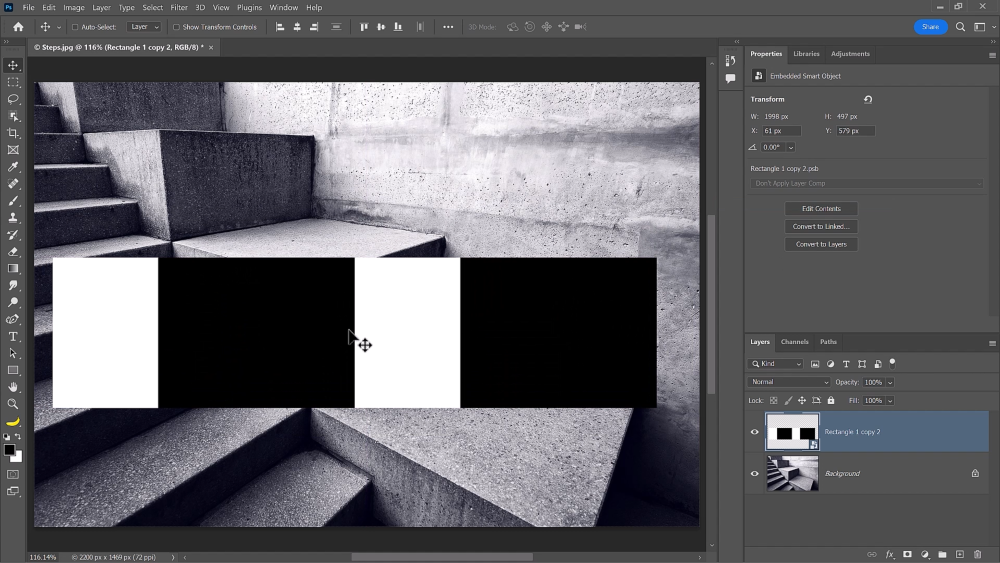
Step 2: Convert to Smart Object
Click on the top rectangle, hold Shift, and click on the bottom one to select all rectangles.
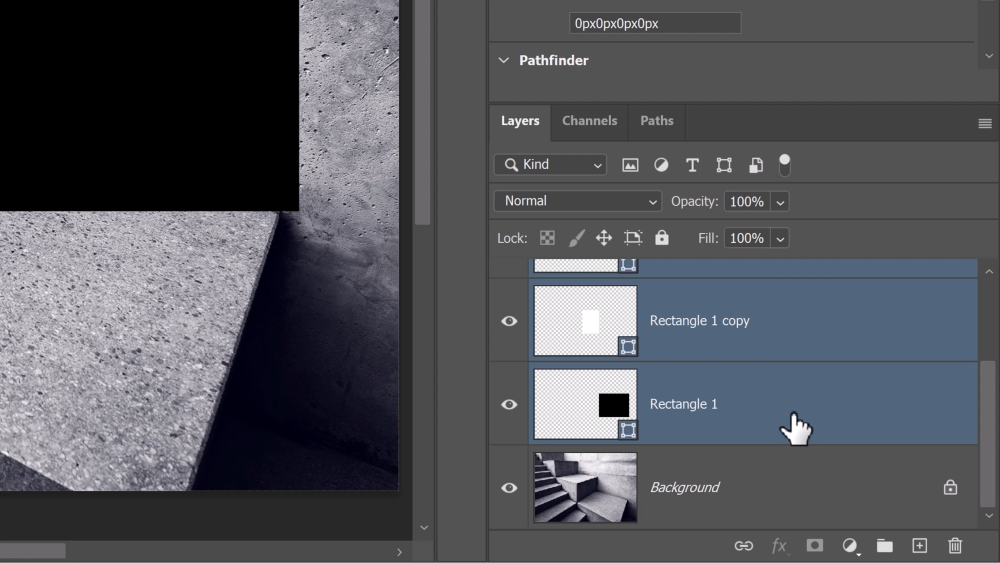
Right-click and convert them into a Smart Object. This will be our template.
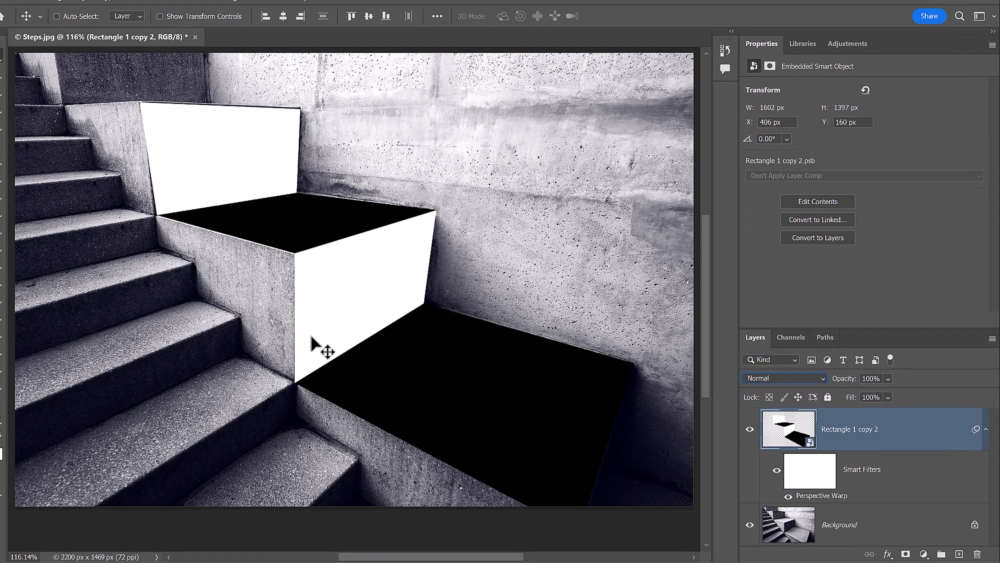
Step 3: Apply Perspective Warp
Go Edit > Perspective Warp.
Create a grid that follows each of the rectangles.
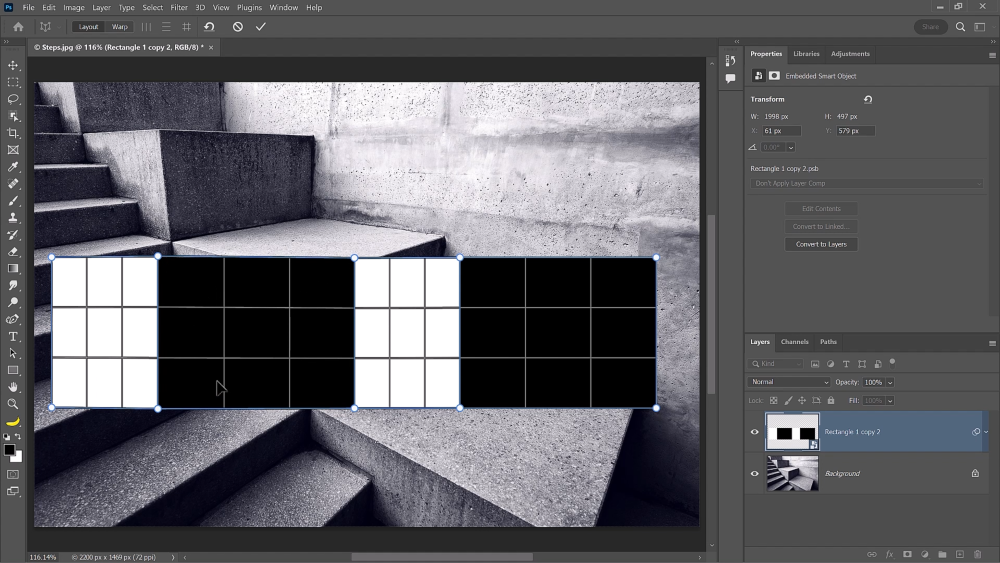
Press W key to enable the Warp mode, then drag on the pins to match the perspective on the steps.
This process might take you some time, but be as accurate as you can.
If you’re having difficulty seeing the background, change the Blending Mode to Color.
Once you have something that looks good, commit the changes by pressing the Enter (Windows) or Return key (macOS).
Step 4: Add Graphic
Double-click on the Smart Object Thumbnail to open up the Smart Object in a new tab.
Add whatever graphic you like over the squares.
You can drag a texture from the Libraries panel and scale it to fit the black square.
Commit the changes and duplicate them by holding Alt (Windows) or Option (macOS) and dragging it over to the other side.
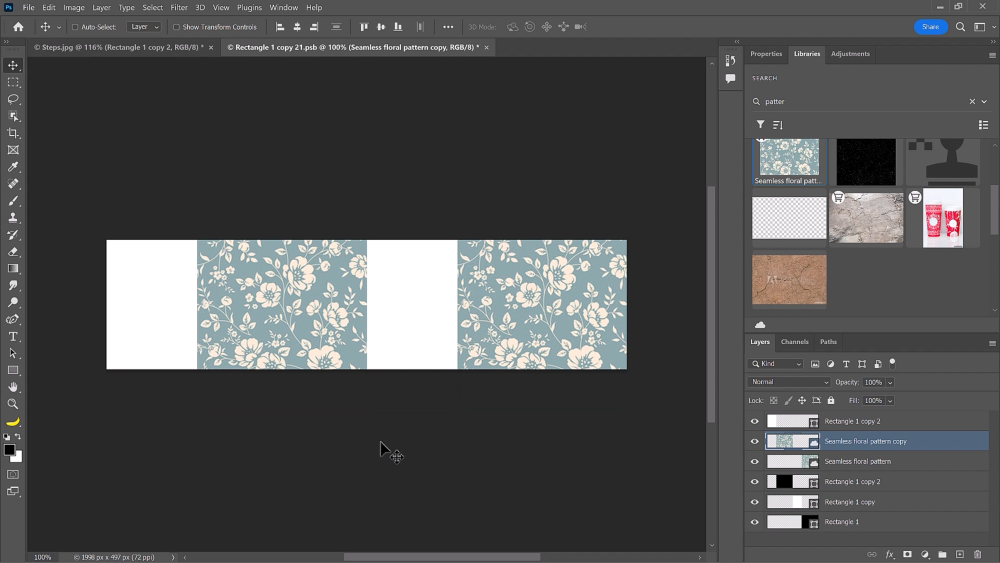
Click Save and you’ll have something like this.
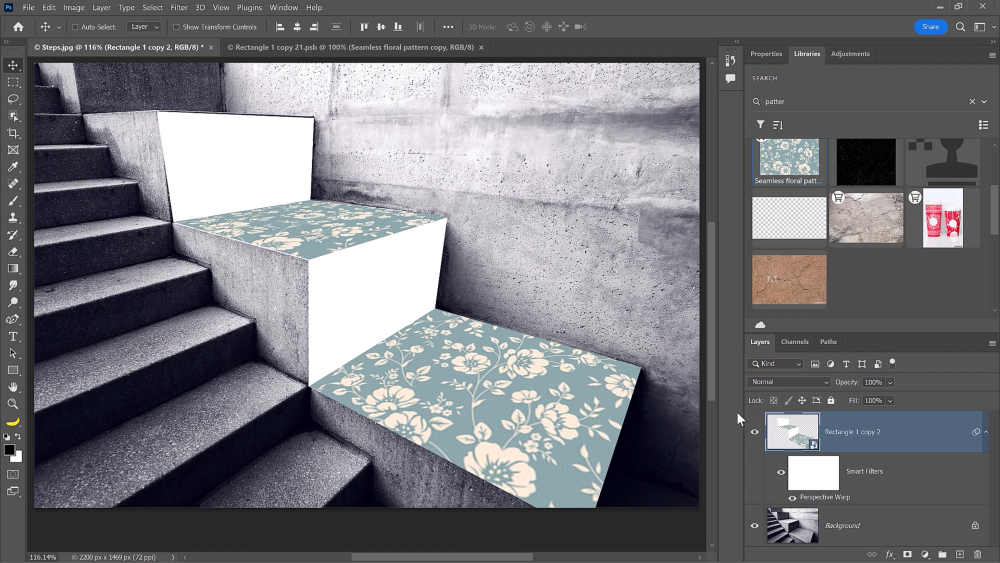
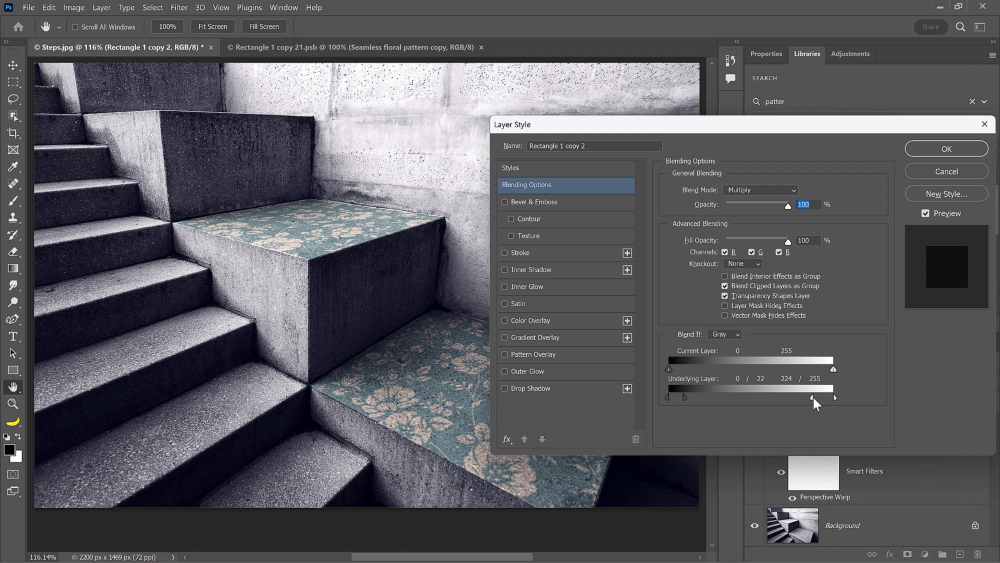
Step 5: Adjust Blend If Option
Double-click on the side of the layer to bring up the Layer Style window.
Under the Underlying Layer Blend If option, hold Alt (Windows) or Option (macOS).
Create a smooth transition between visible and invisible pixels on the shadows by splitting it in half to make it more realistic.
You’ll see the highlights pop through on this step when you do the same thing on the other side.